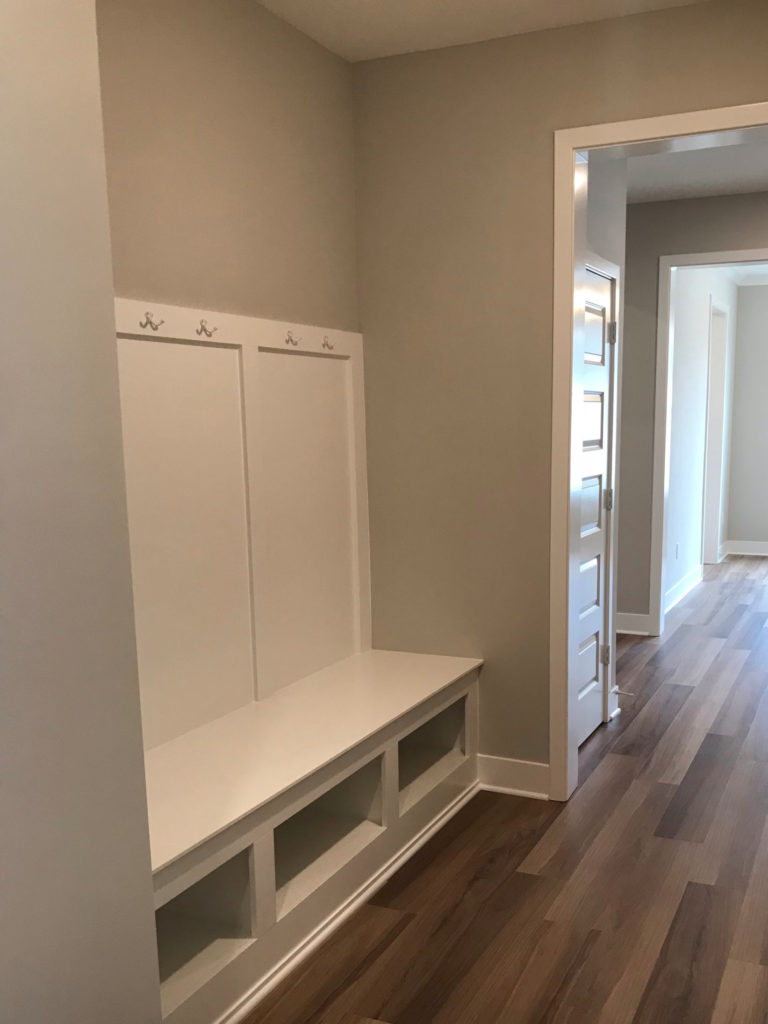
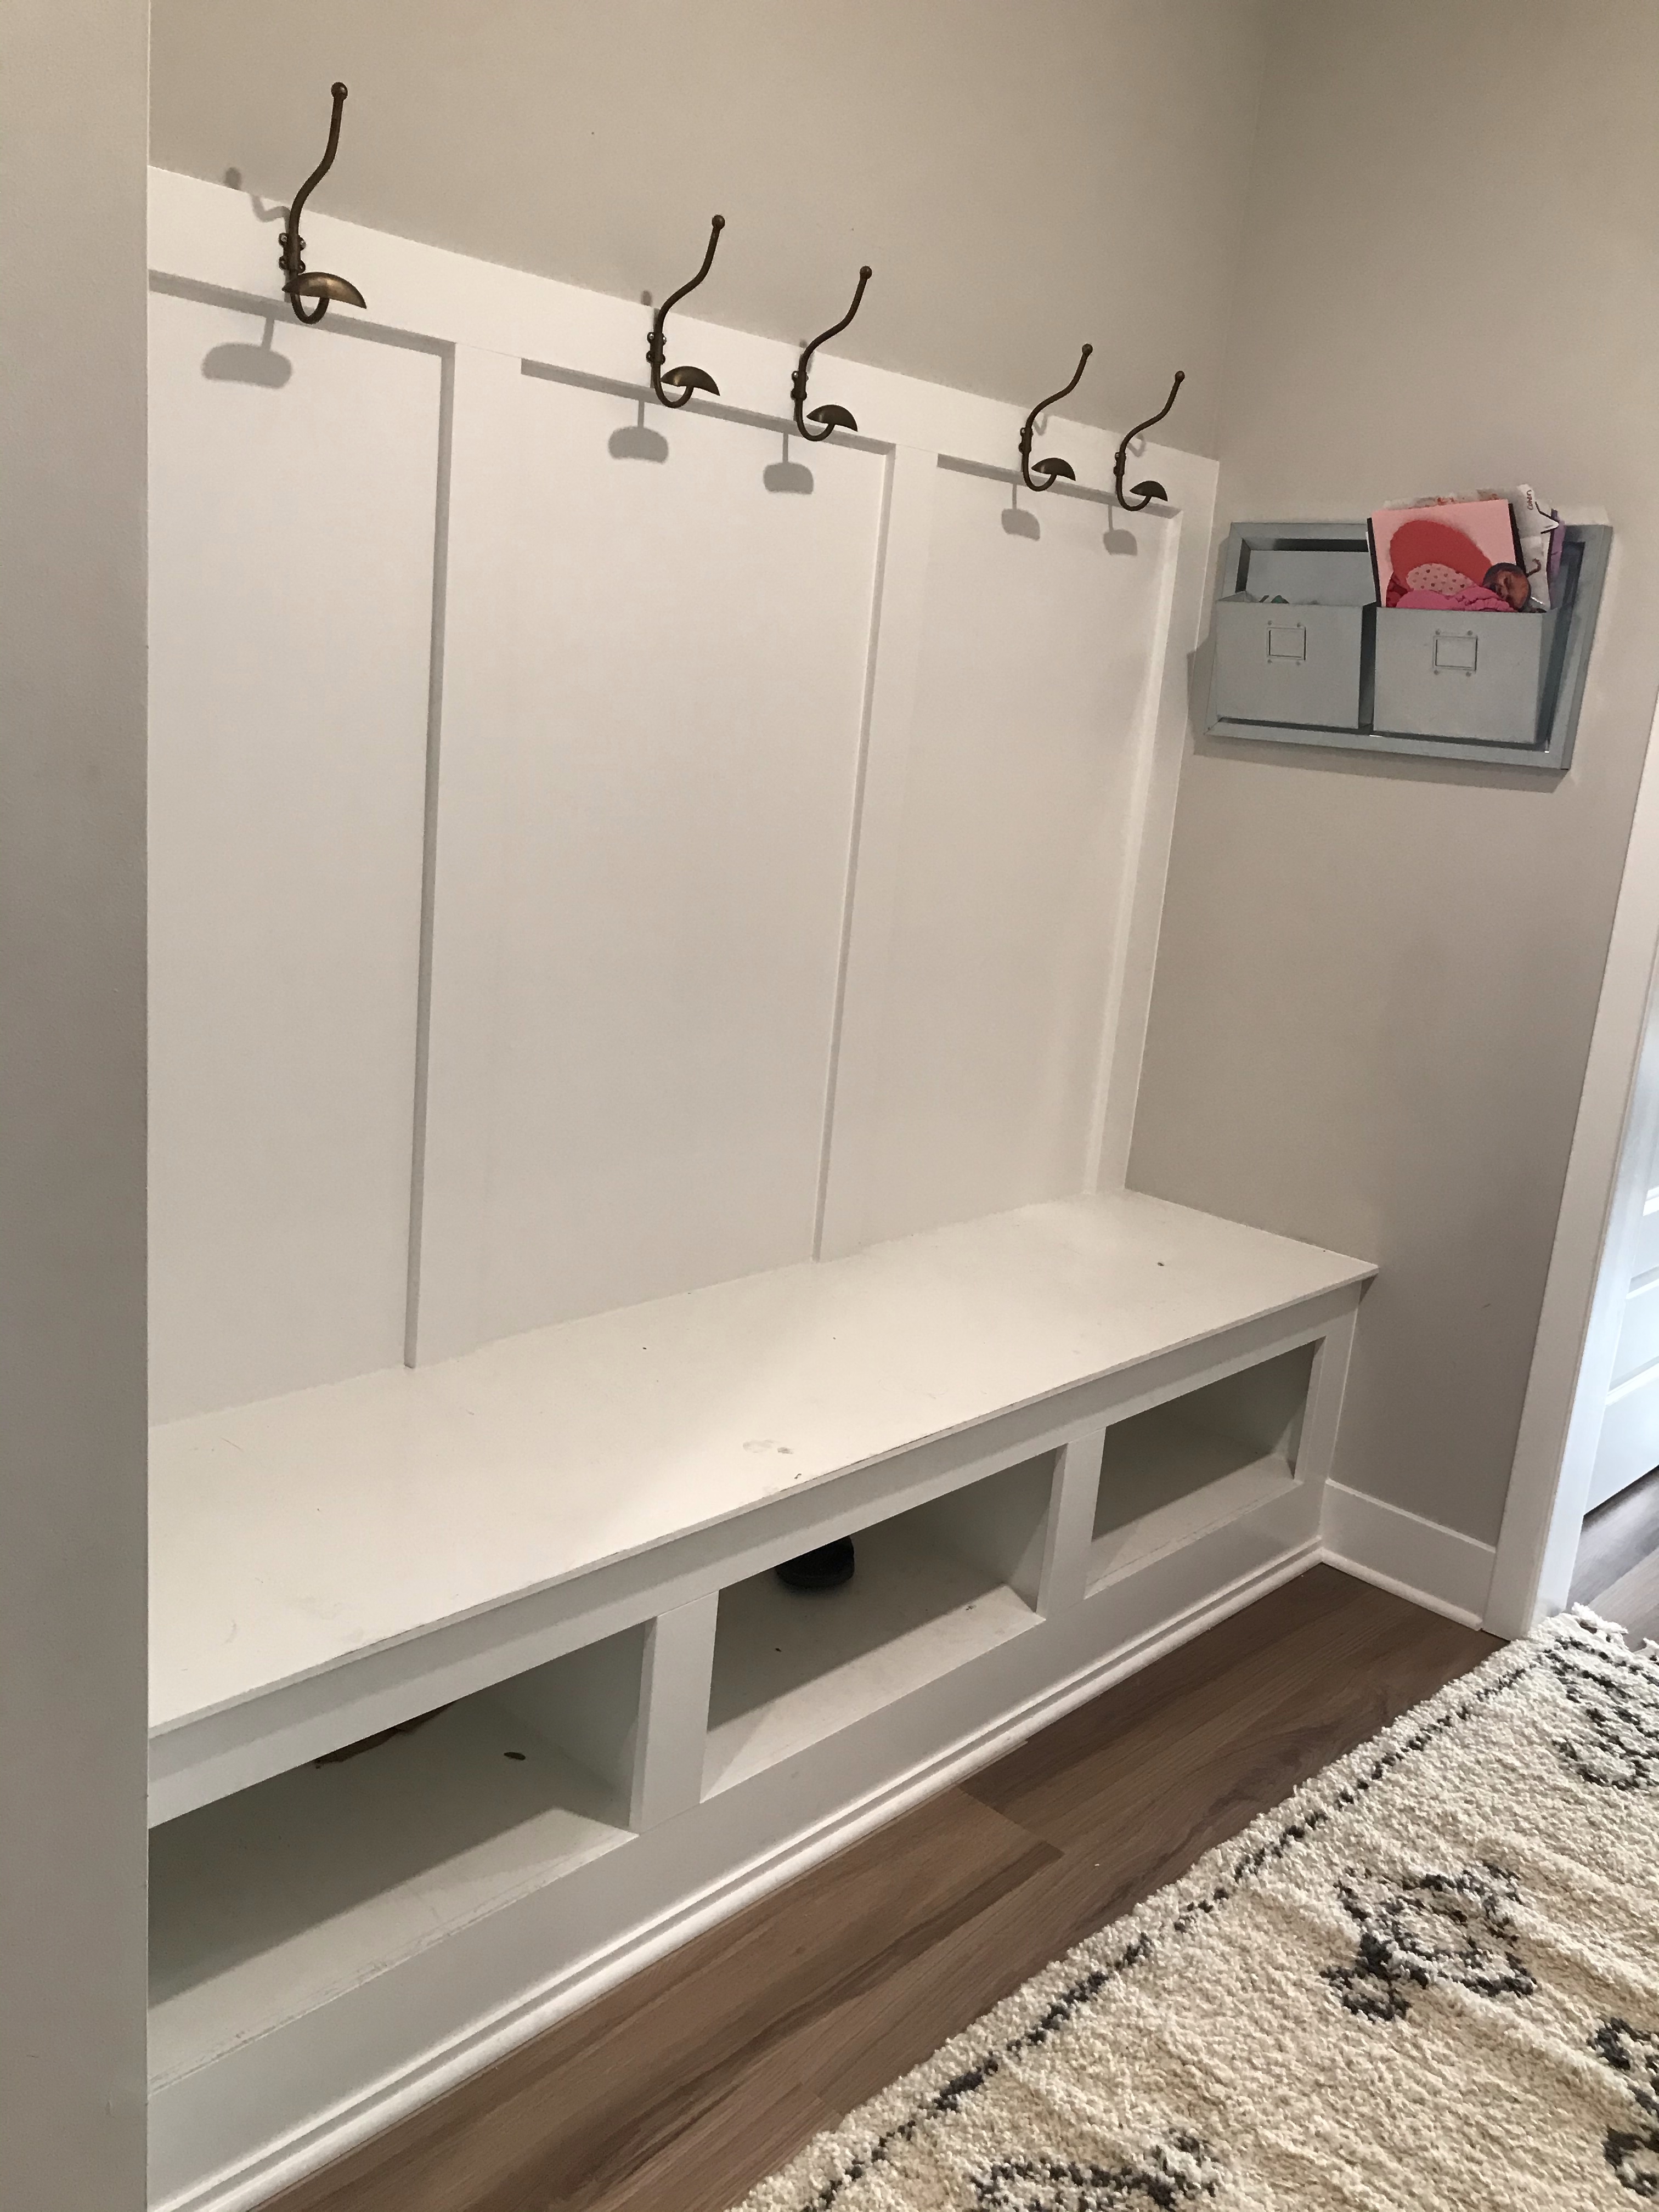
Before 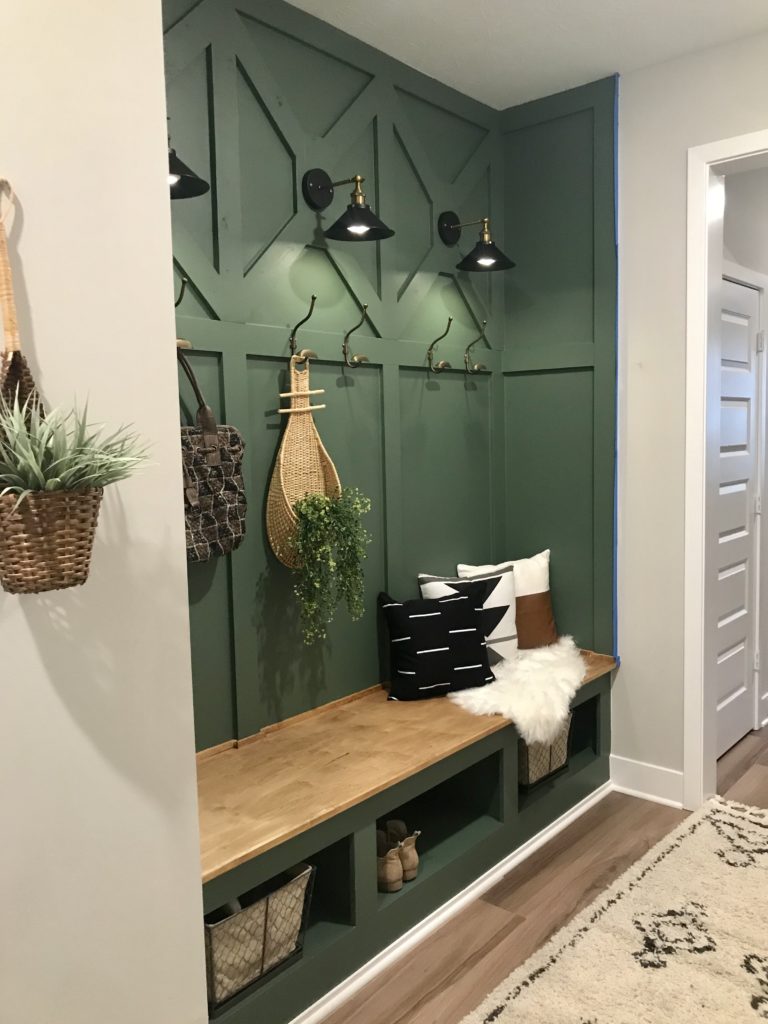
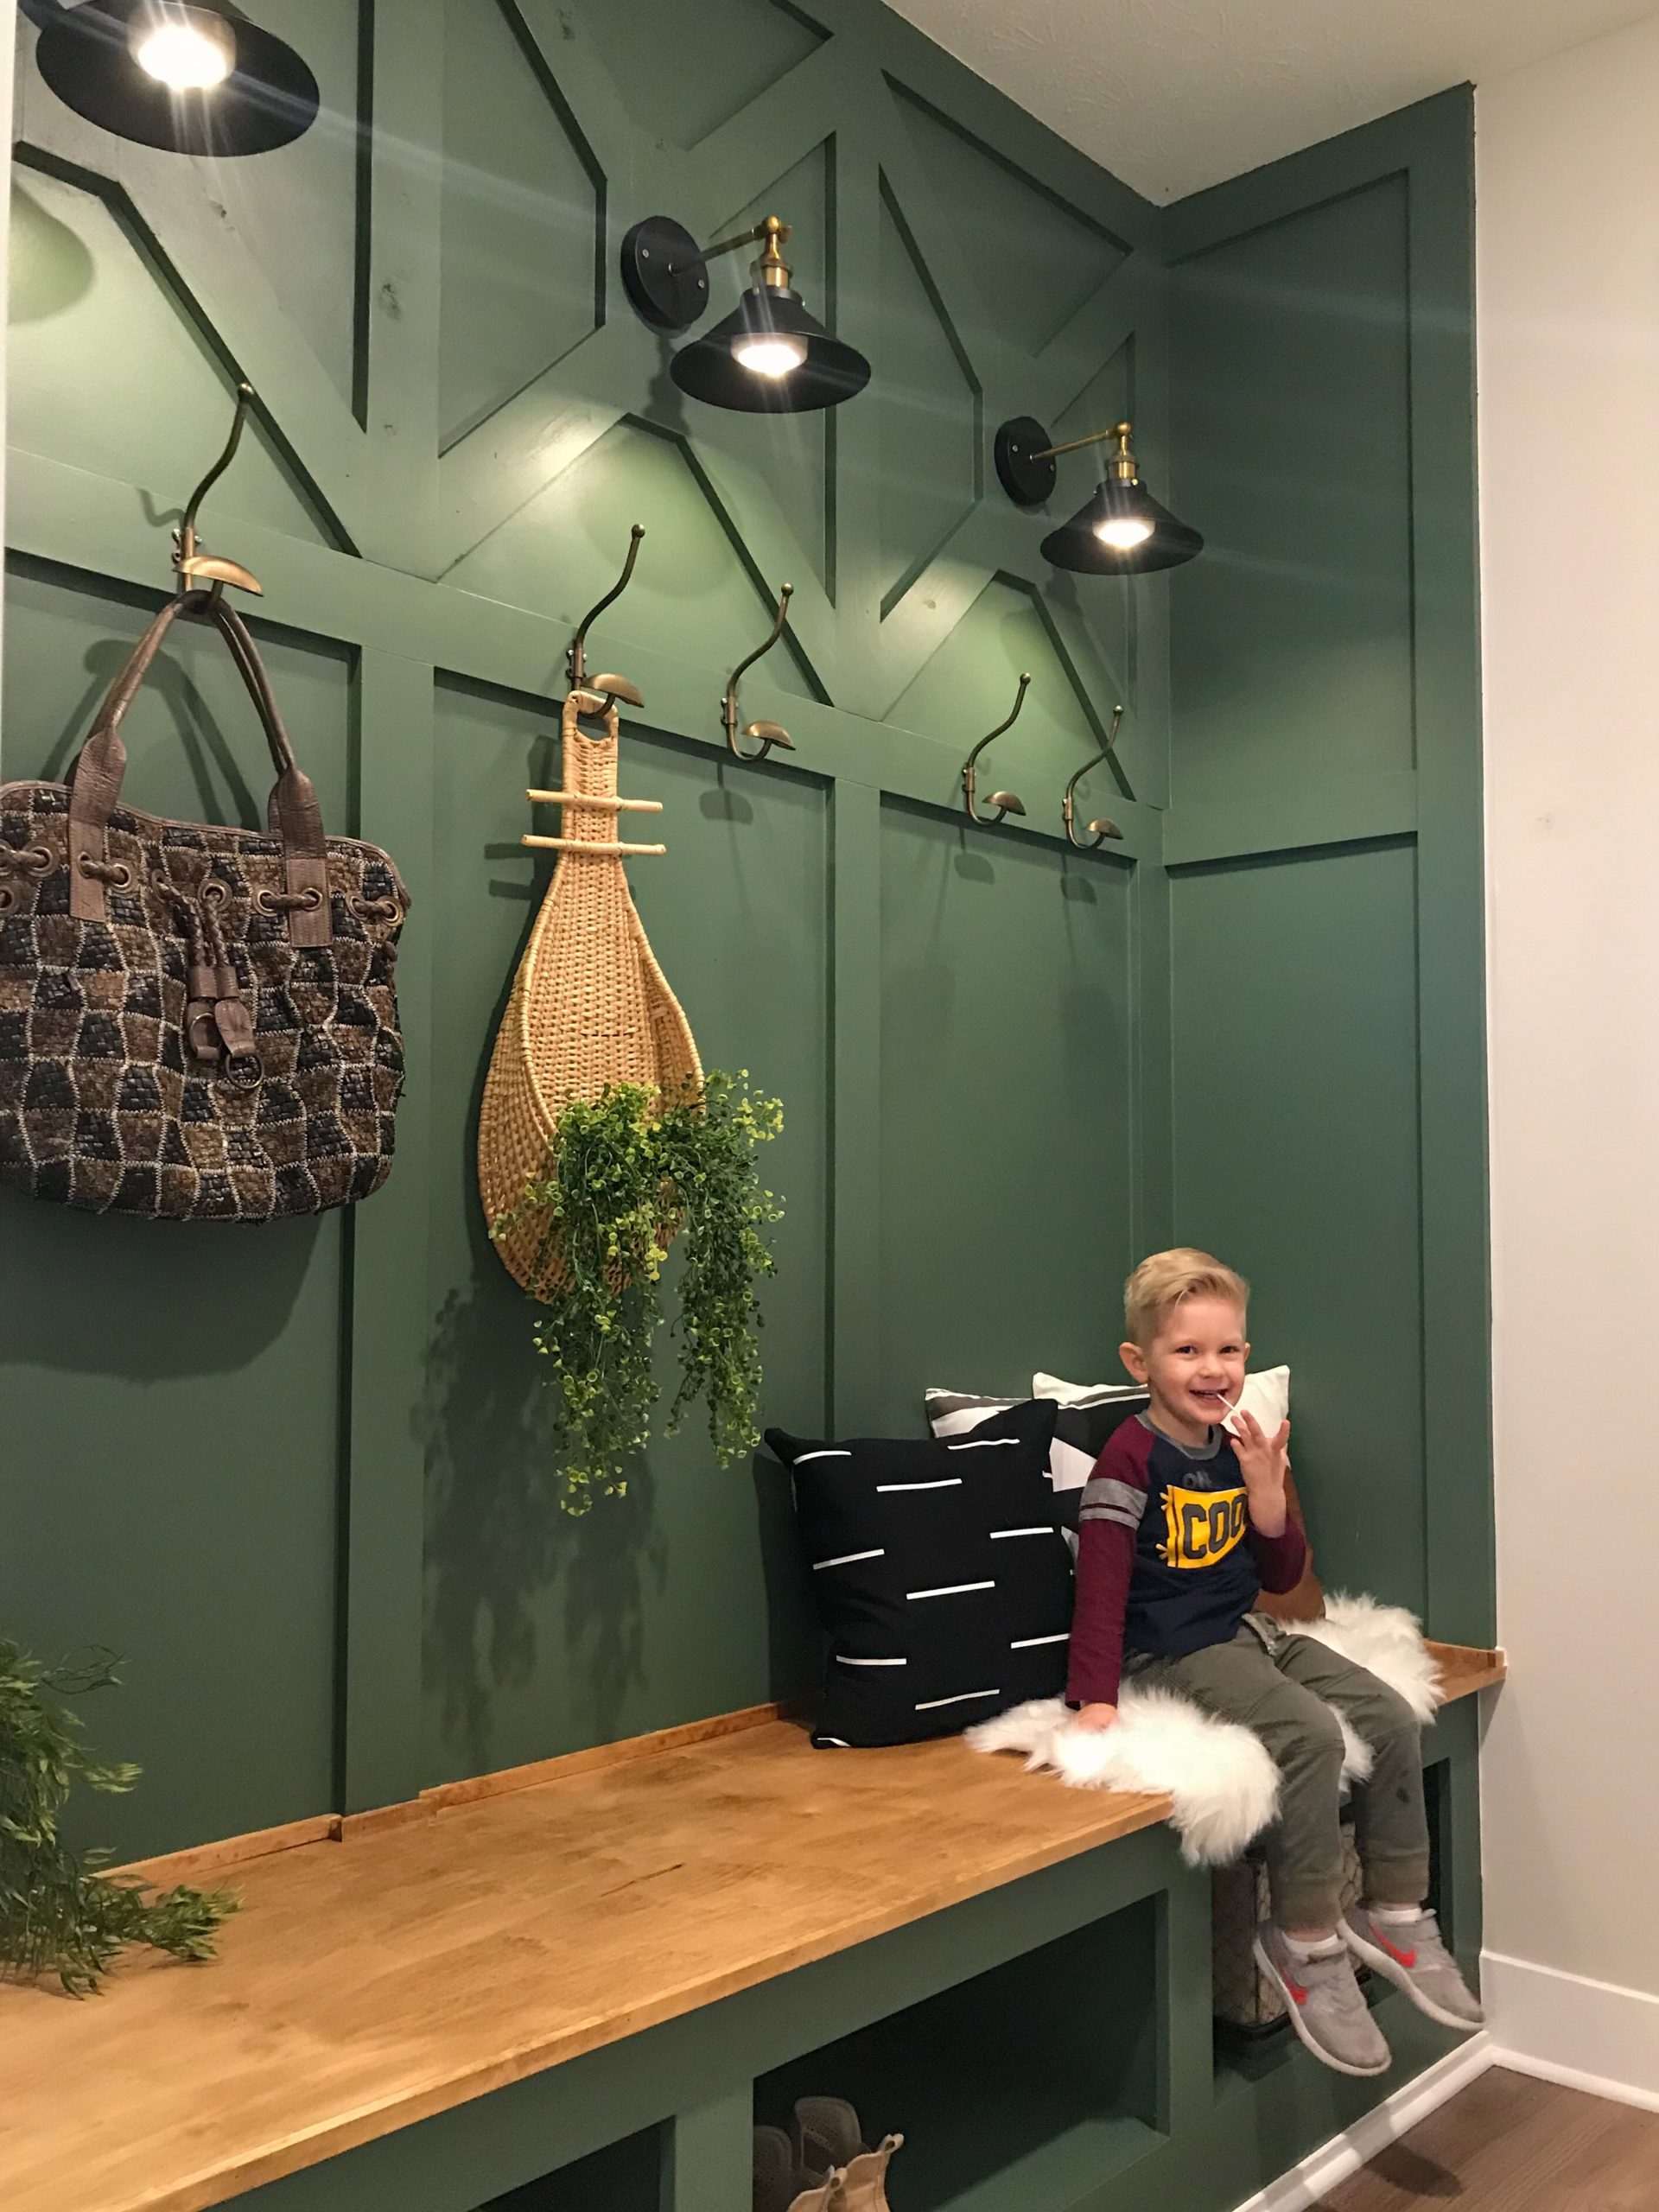
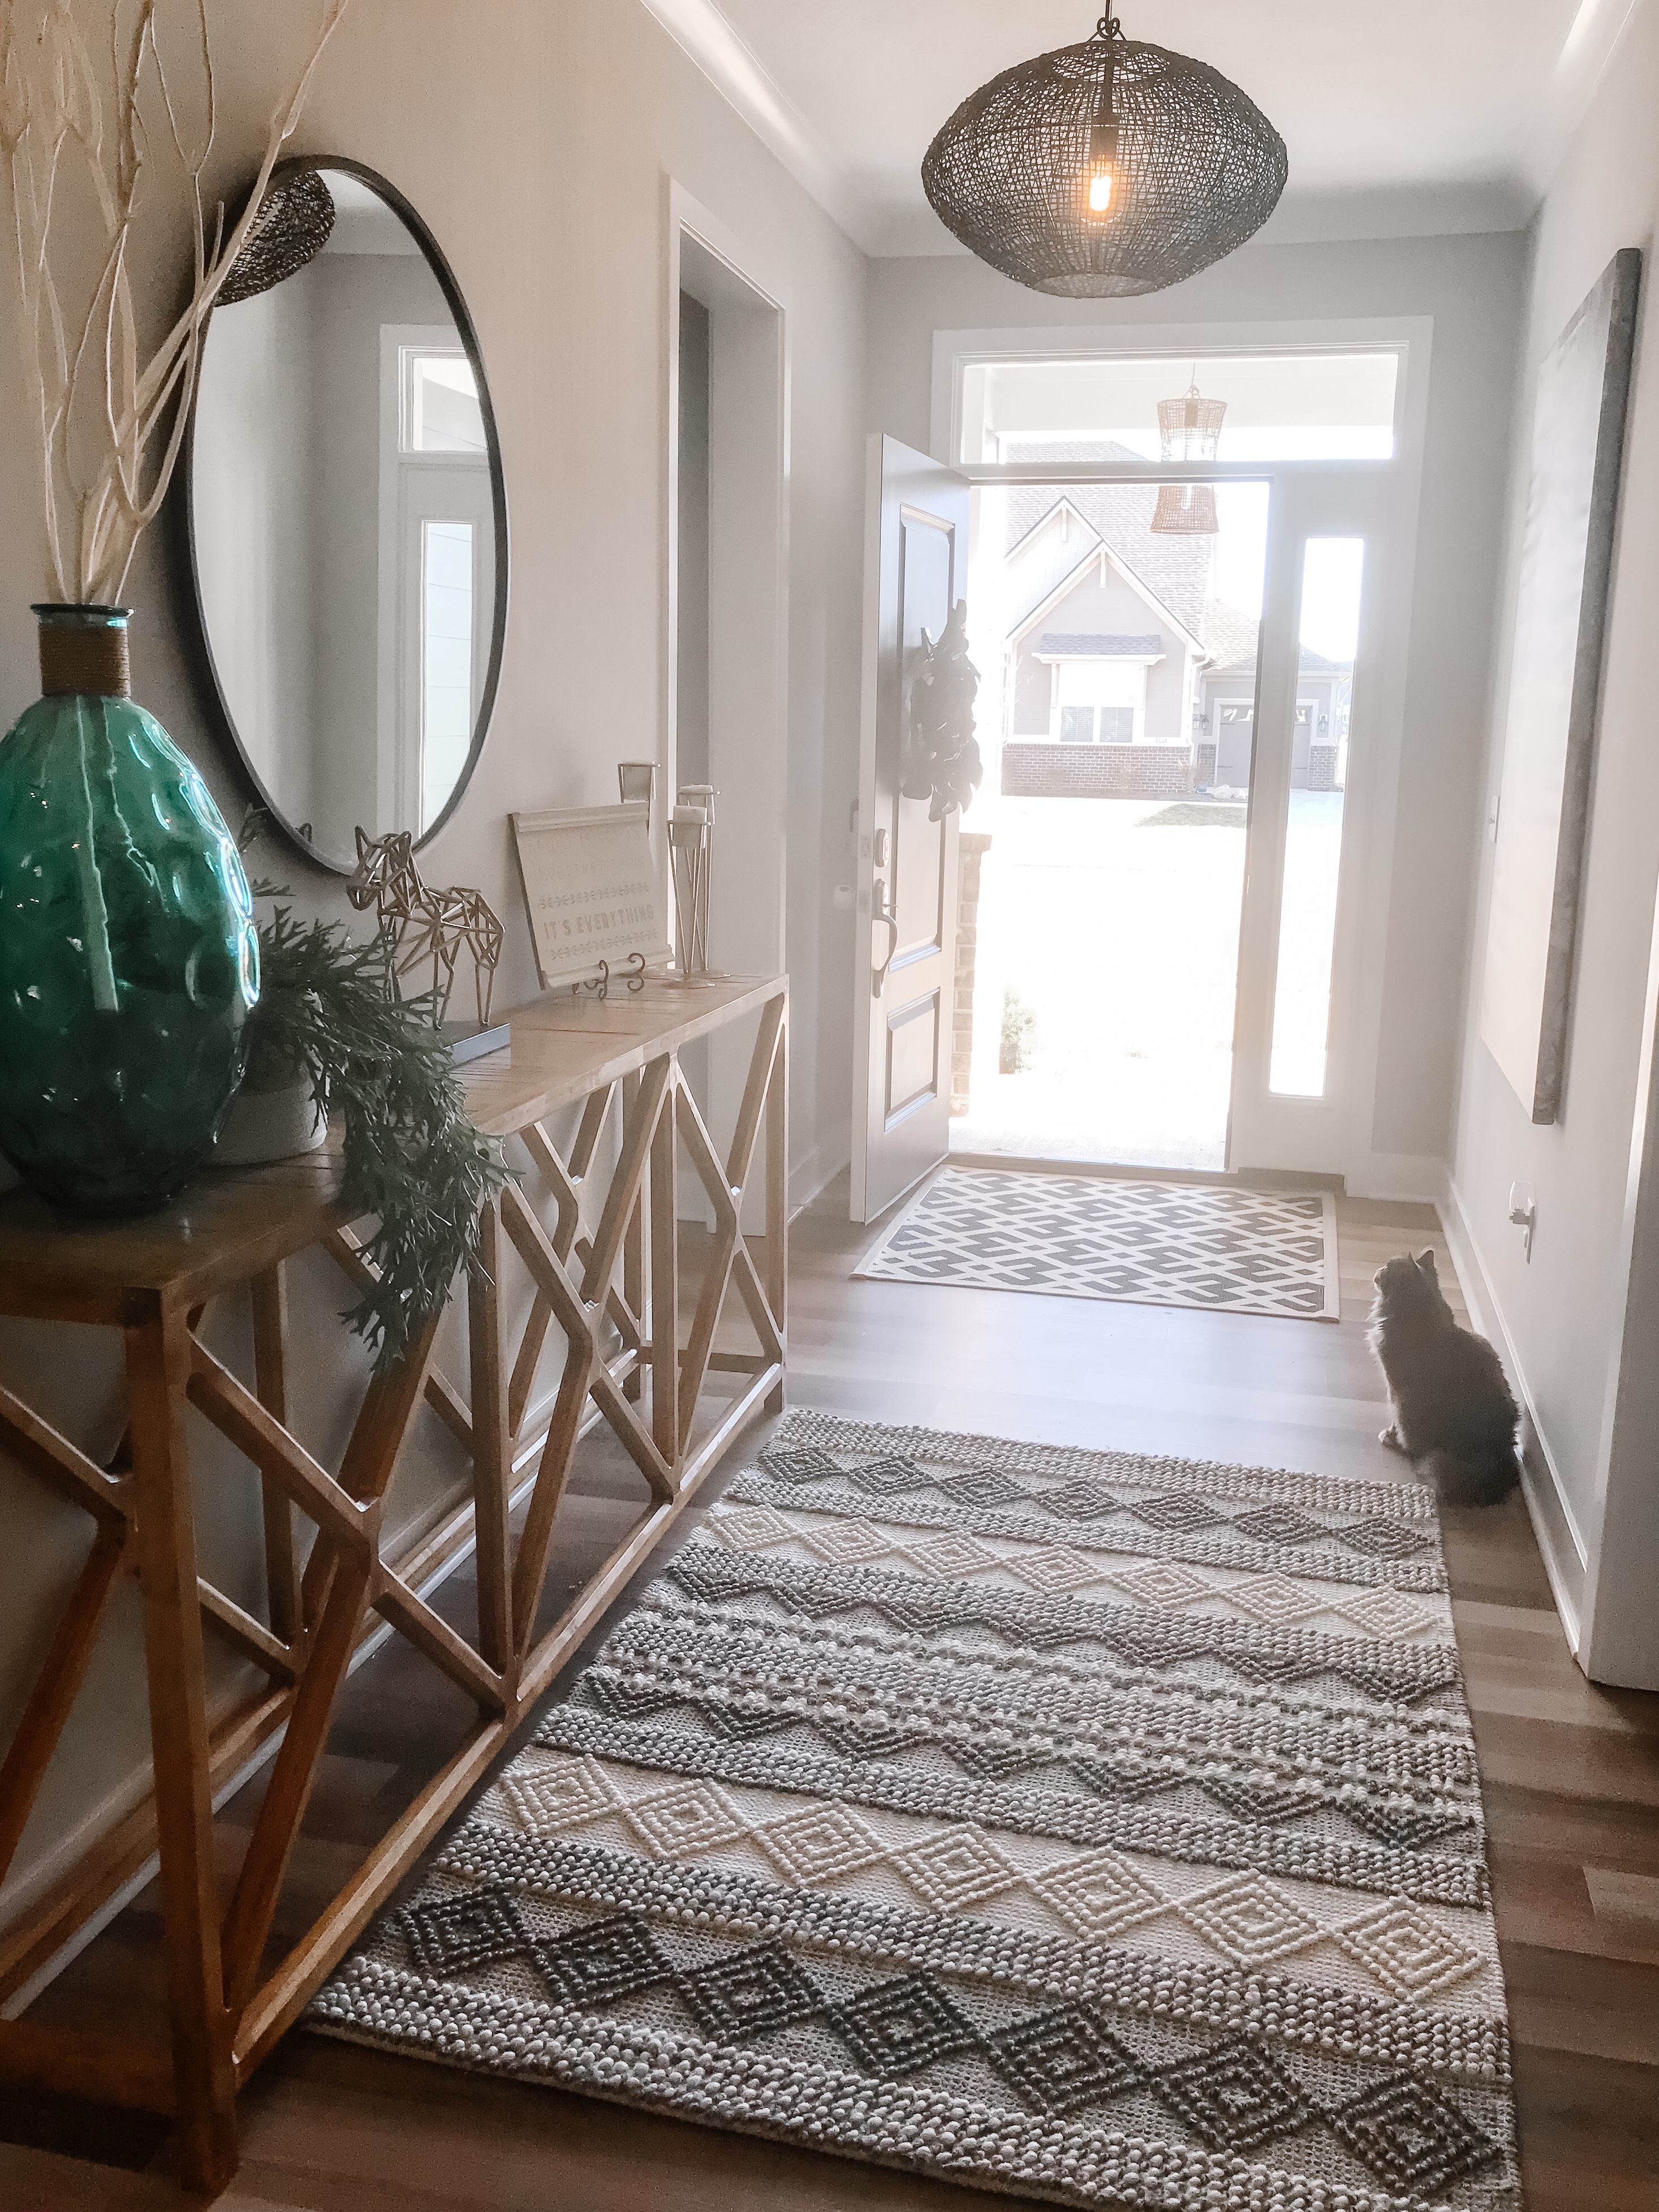
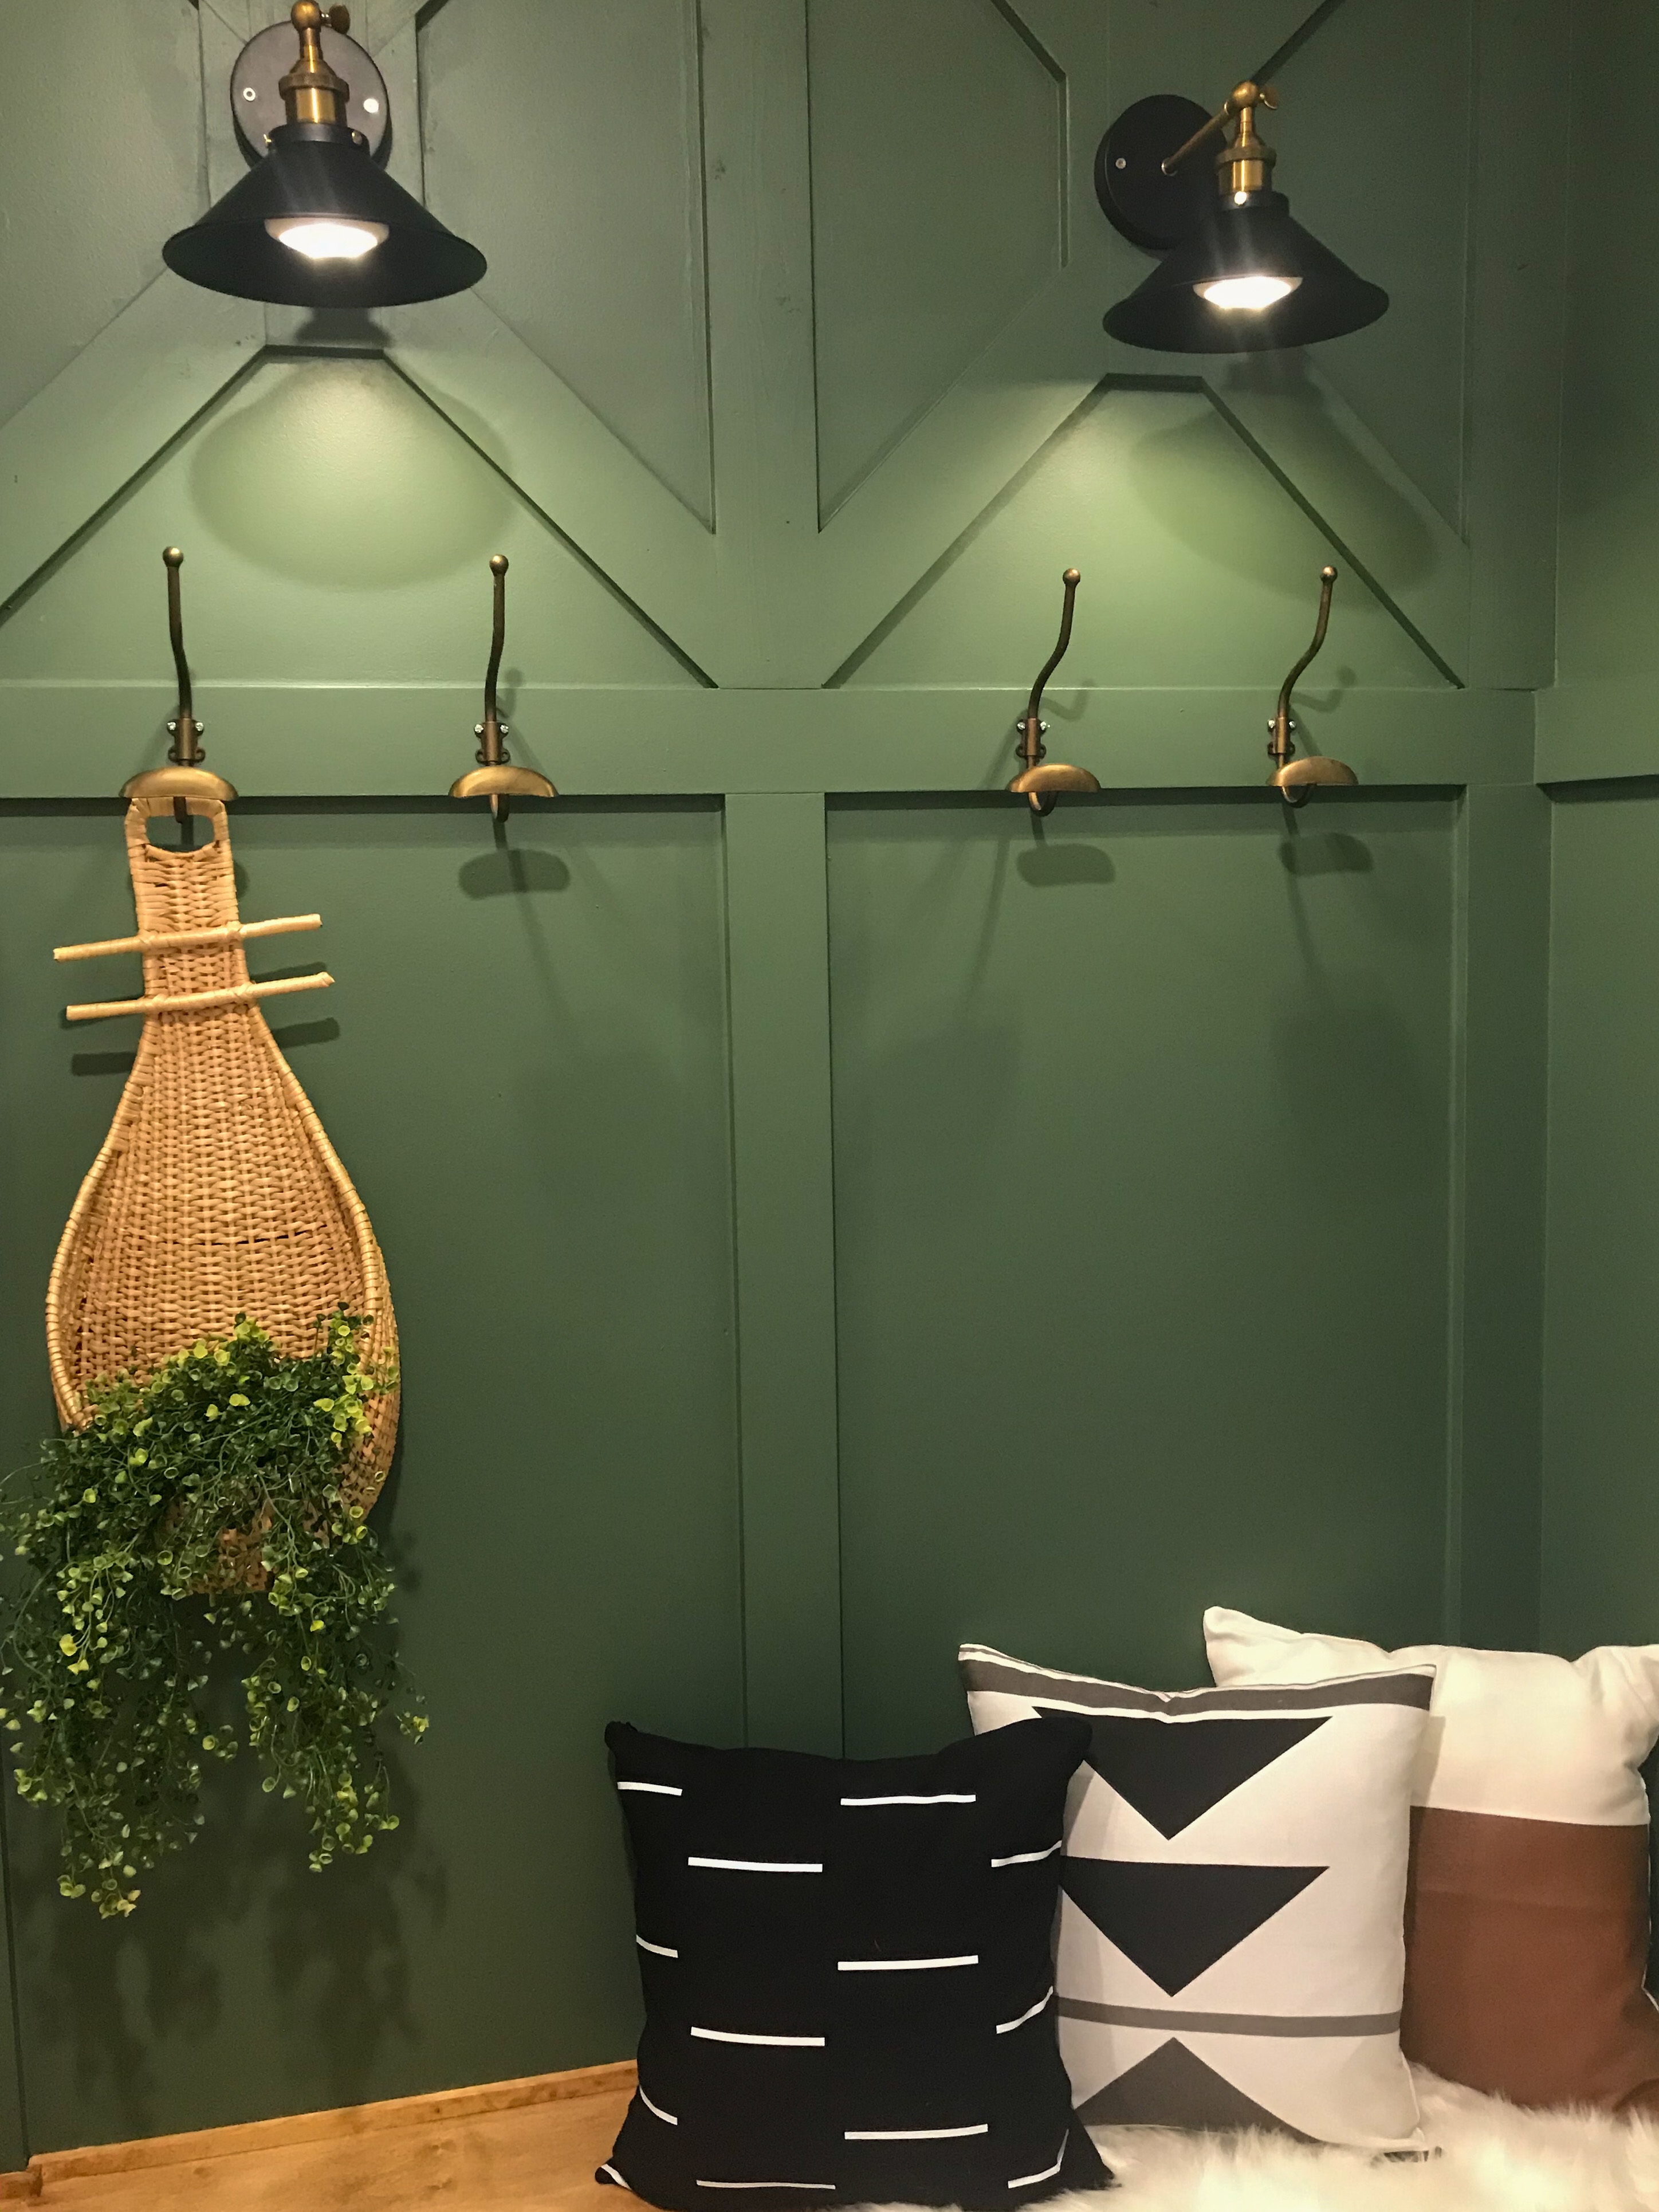
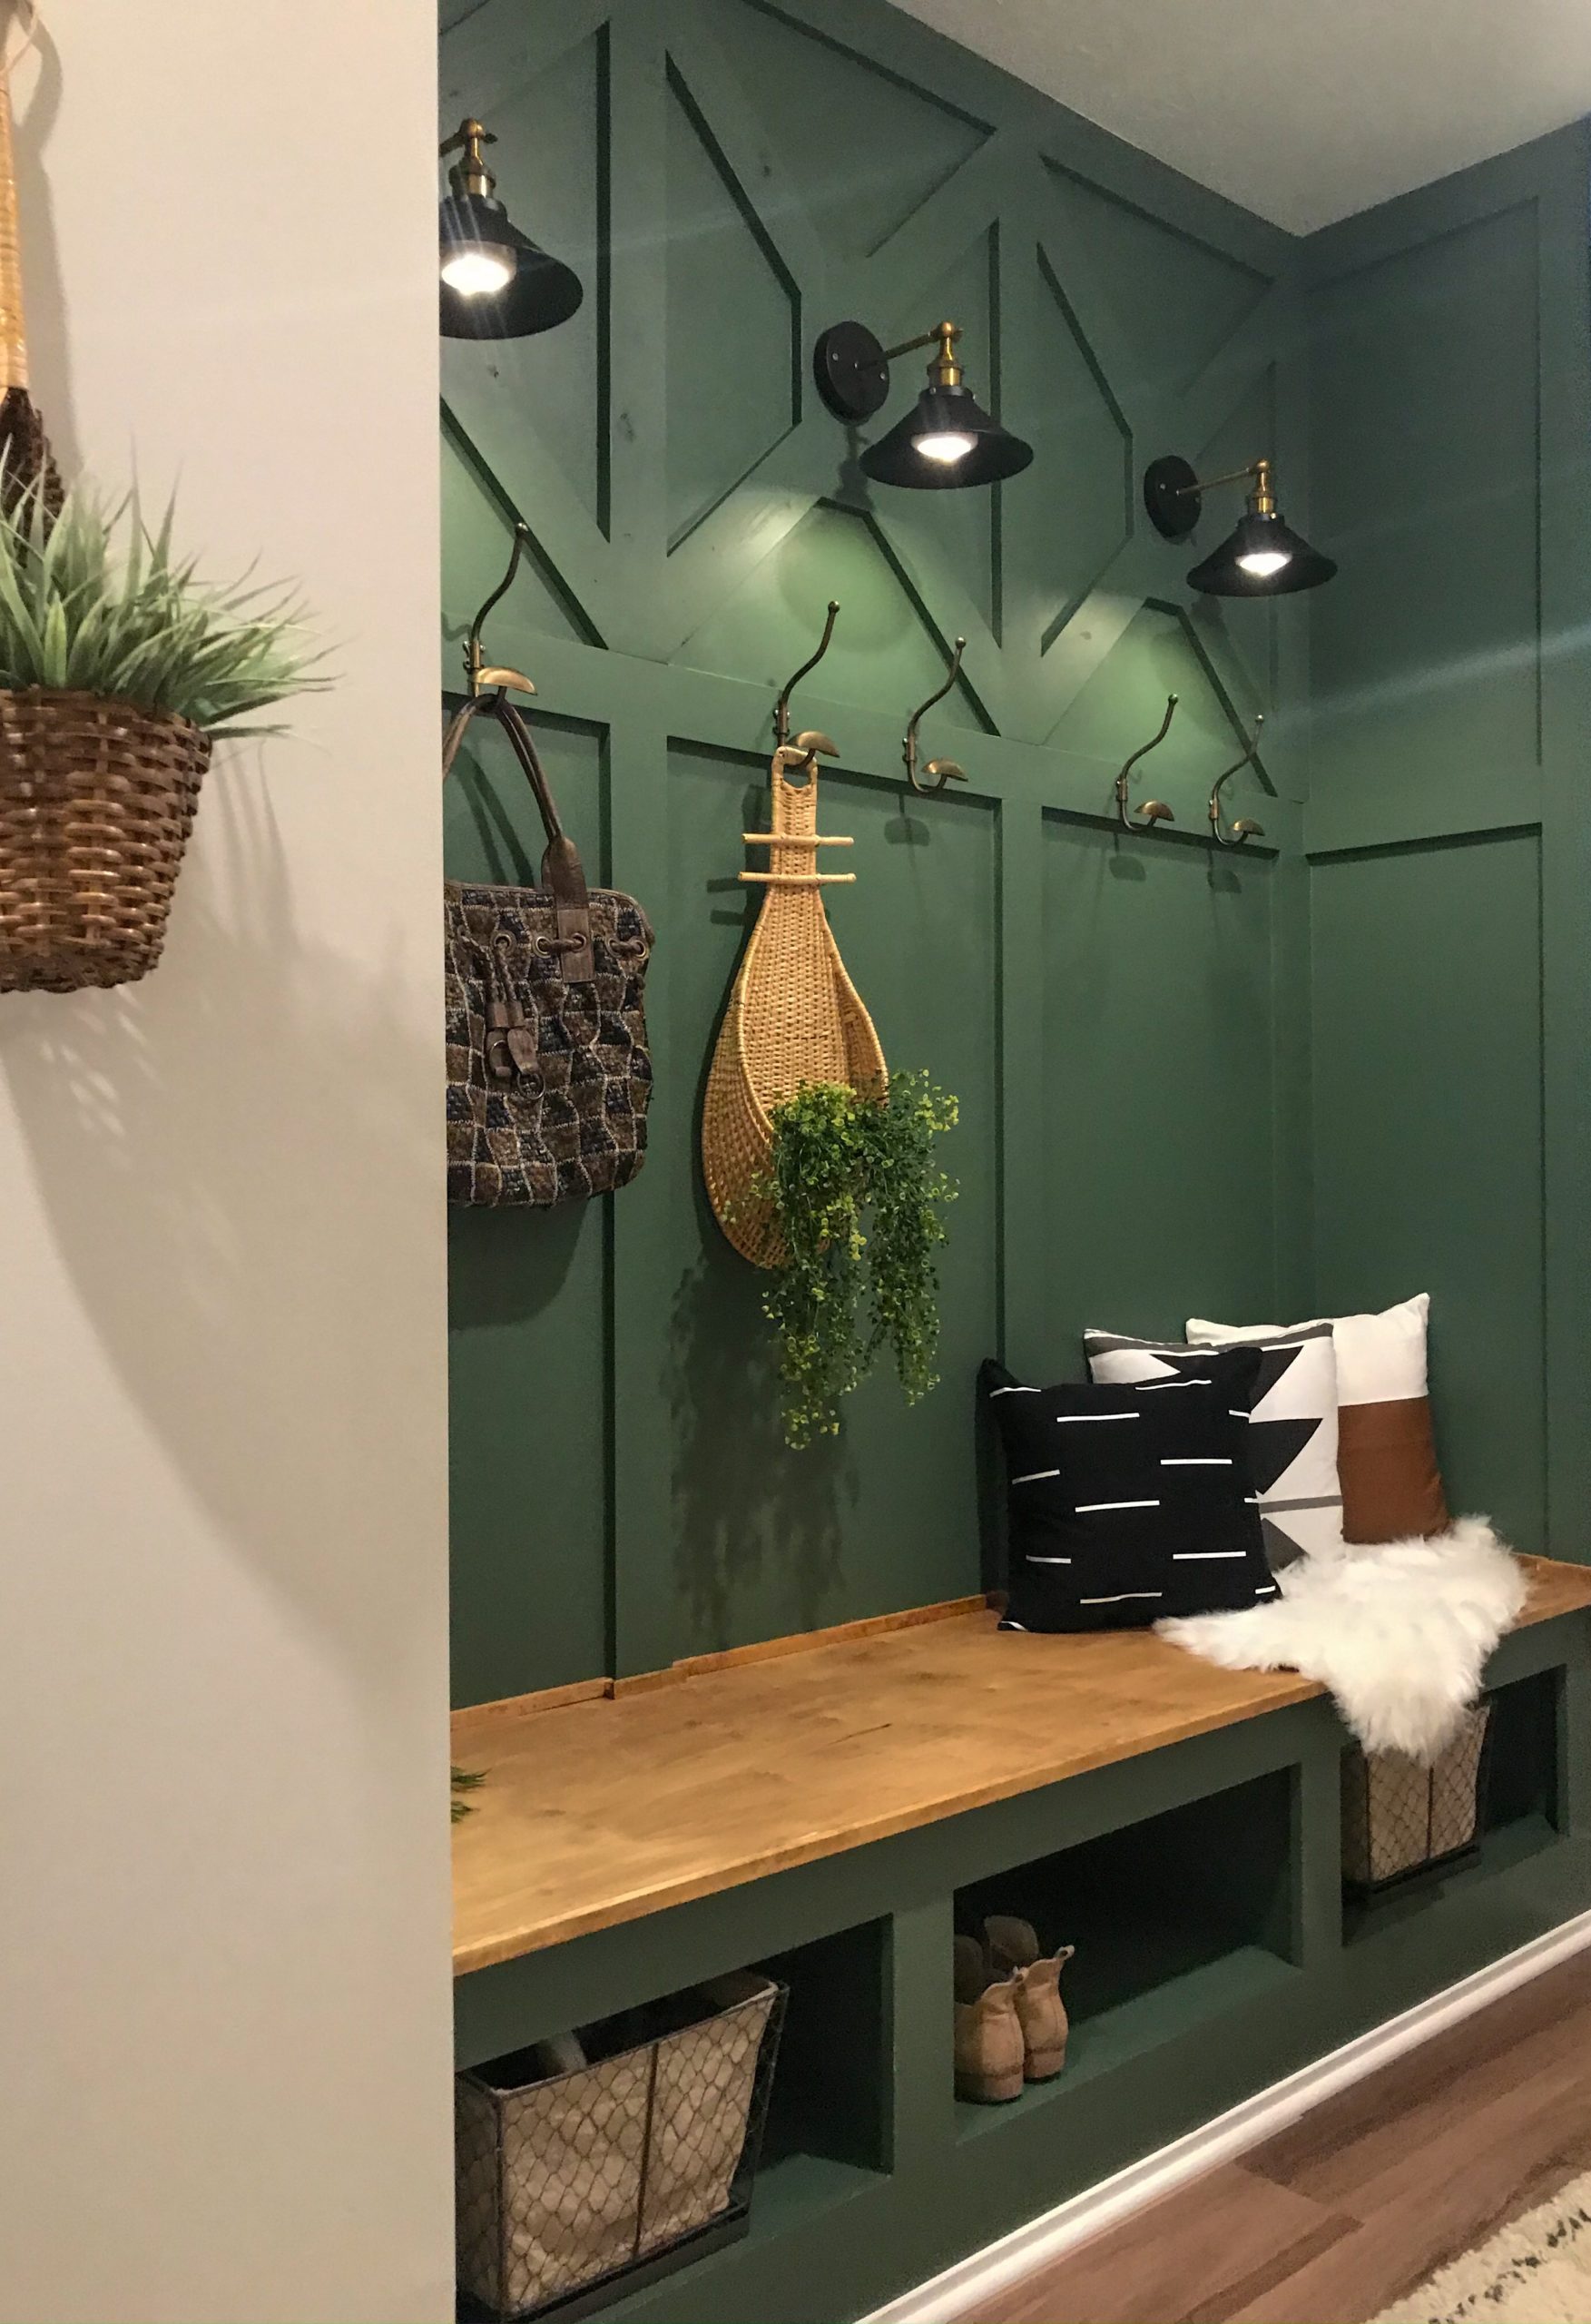
After
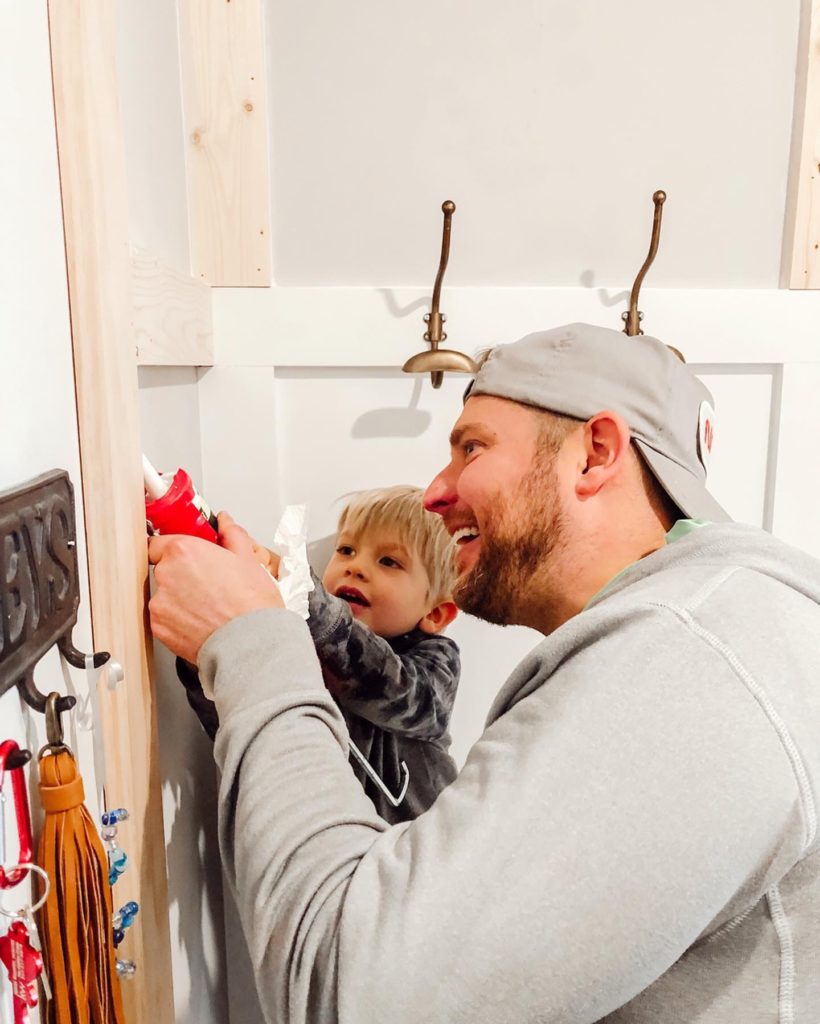
We took our builder grade mudroom cubbie area and gave it a custom look. Don’t get me wrong, there was nothing wrong with what was there- but so much white in an area that gets shoes thrown on it all day just isn’t my style. If there is a place I can add a pop of color, I am going to do it! This project ended up being a lot of fun! I mentioned this random idea to my husband as we were headed out the door, and he jumped right into the project with me with no hesitation! My husband is the type of guy who loves to keep busy and have a project or hobby to work on all the time. This was the first project where we got to have our little guys in on it as well to help paint and fill holes, which just made their days. Seeing their little proud faces melted us and made it so much more worth it- even if it took 10x longer! Overall, this project was under $200 and just over a week to finish during our down time.
I wanted to make the mudroom bench feel more grand and custom. I knew I wanted it to go all the way to the ceiling and incorporate some lighting so we don’t always have to turn on the bright hall lights. We settled on a deep green paint color with brass and wood accents. It is truly amazing what a a gallon of paint can do for a space! It turned out even better than we imagined, and is a great feature in the house now.
Tools and Materials:
- Click on underlined items for direct links!
- 1×4 Pine Boards 8′ Length
- 1/4″ Birch 4’x8′ Panel
- 1/4 in. x 3/4 in. x 96 in. Pine Screen Moulding
- Finish Trim Nails
- Caulk
- Wood Filler
- 220 Grit Sanding Block
- 2″ Purdy Paint Brush
- 3/8″ Nap Paint Roller
- 1 Gal Sherwin Williams Pro Mar 200- Fresh Balsam
- Minwax Wood Stain- Golden Oak
- Miter Saw (prefer Rigid brand)
- Finish Nailer (prefer Rigid brand)
Accessories and Decor Sources:
- Click on underlined items for direct links!
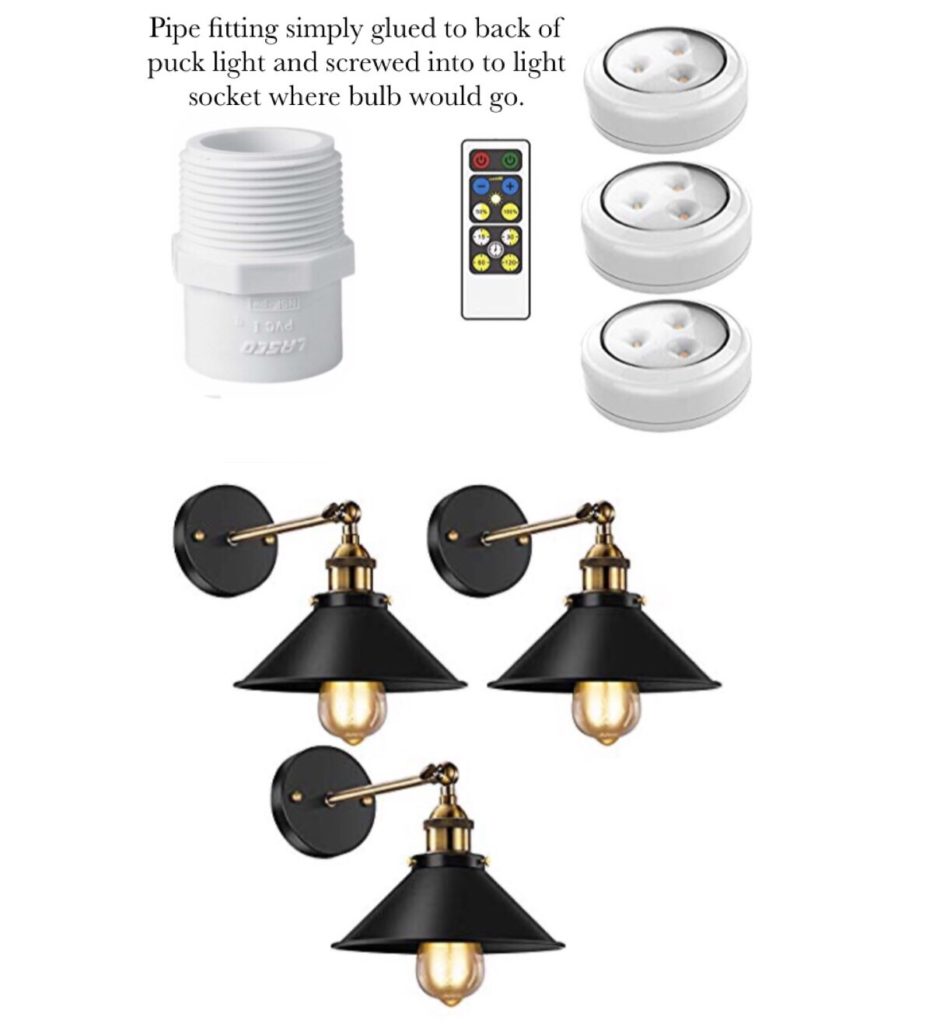
- Brass and Black Sconces (Amazon)
- LED Puck Lights with Remote (Amazon)
- Brass Hooks (Hobby Lobby)
- Pillow Covers (Amazon)
- Faux Fur Throw (Amazon)
- Hanging Basket (Goodwill)
- Faux Plants (Hobby Lobby)
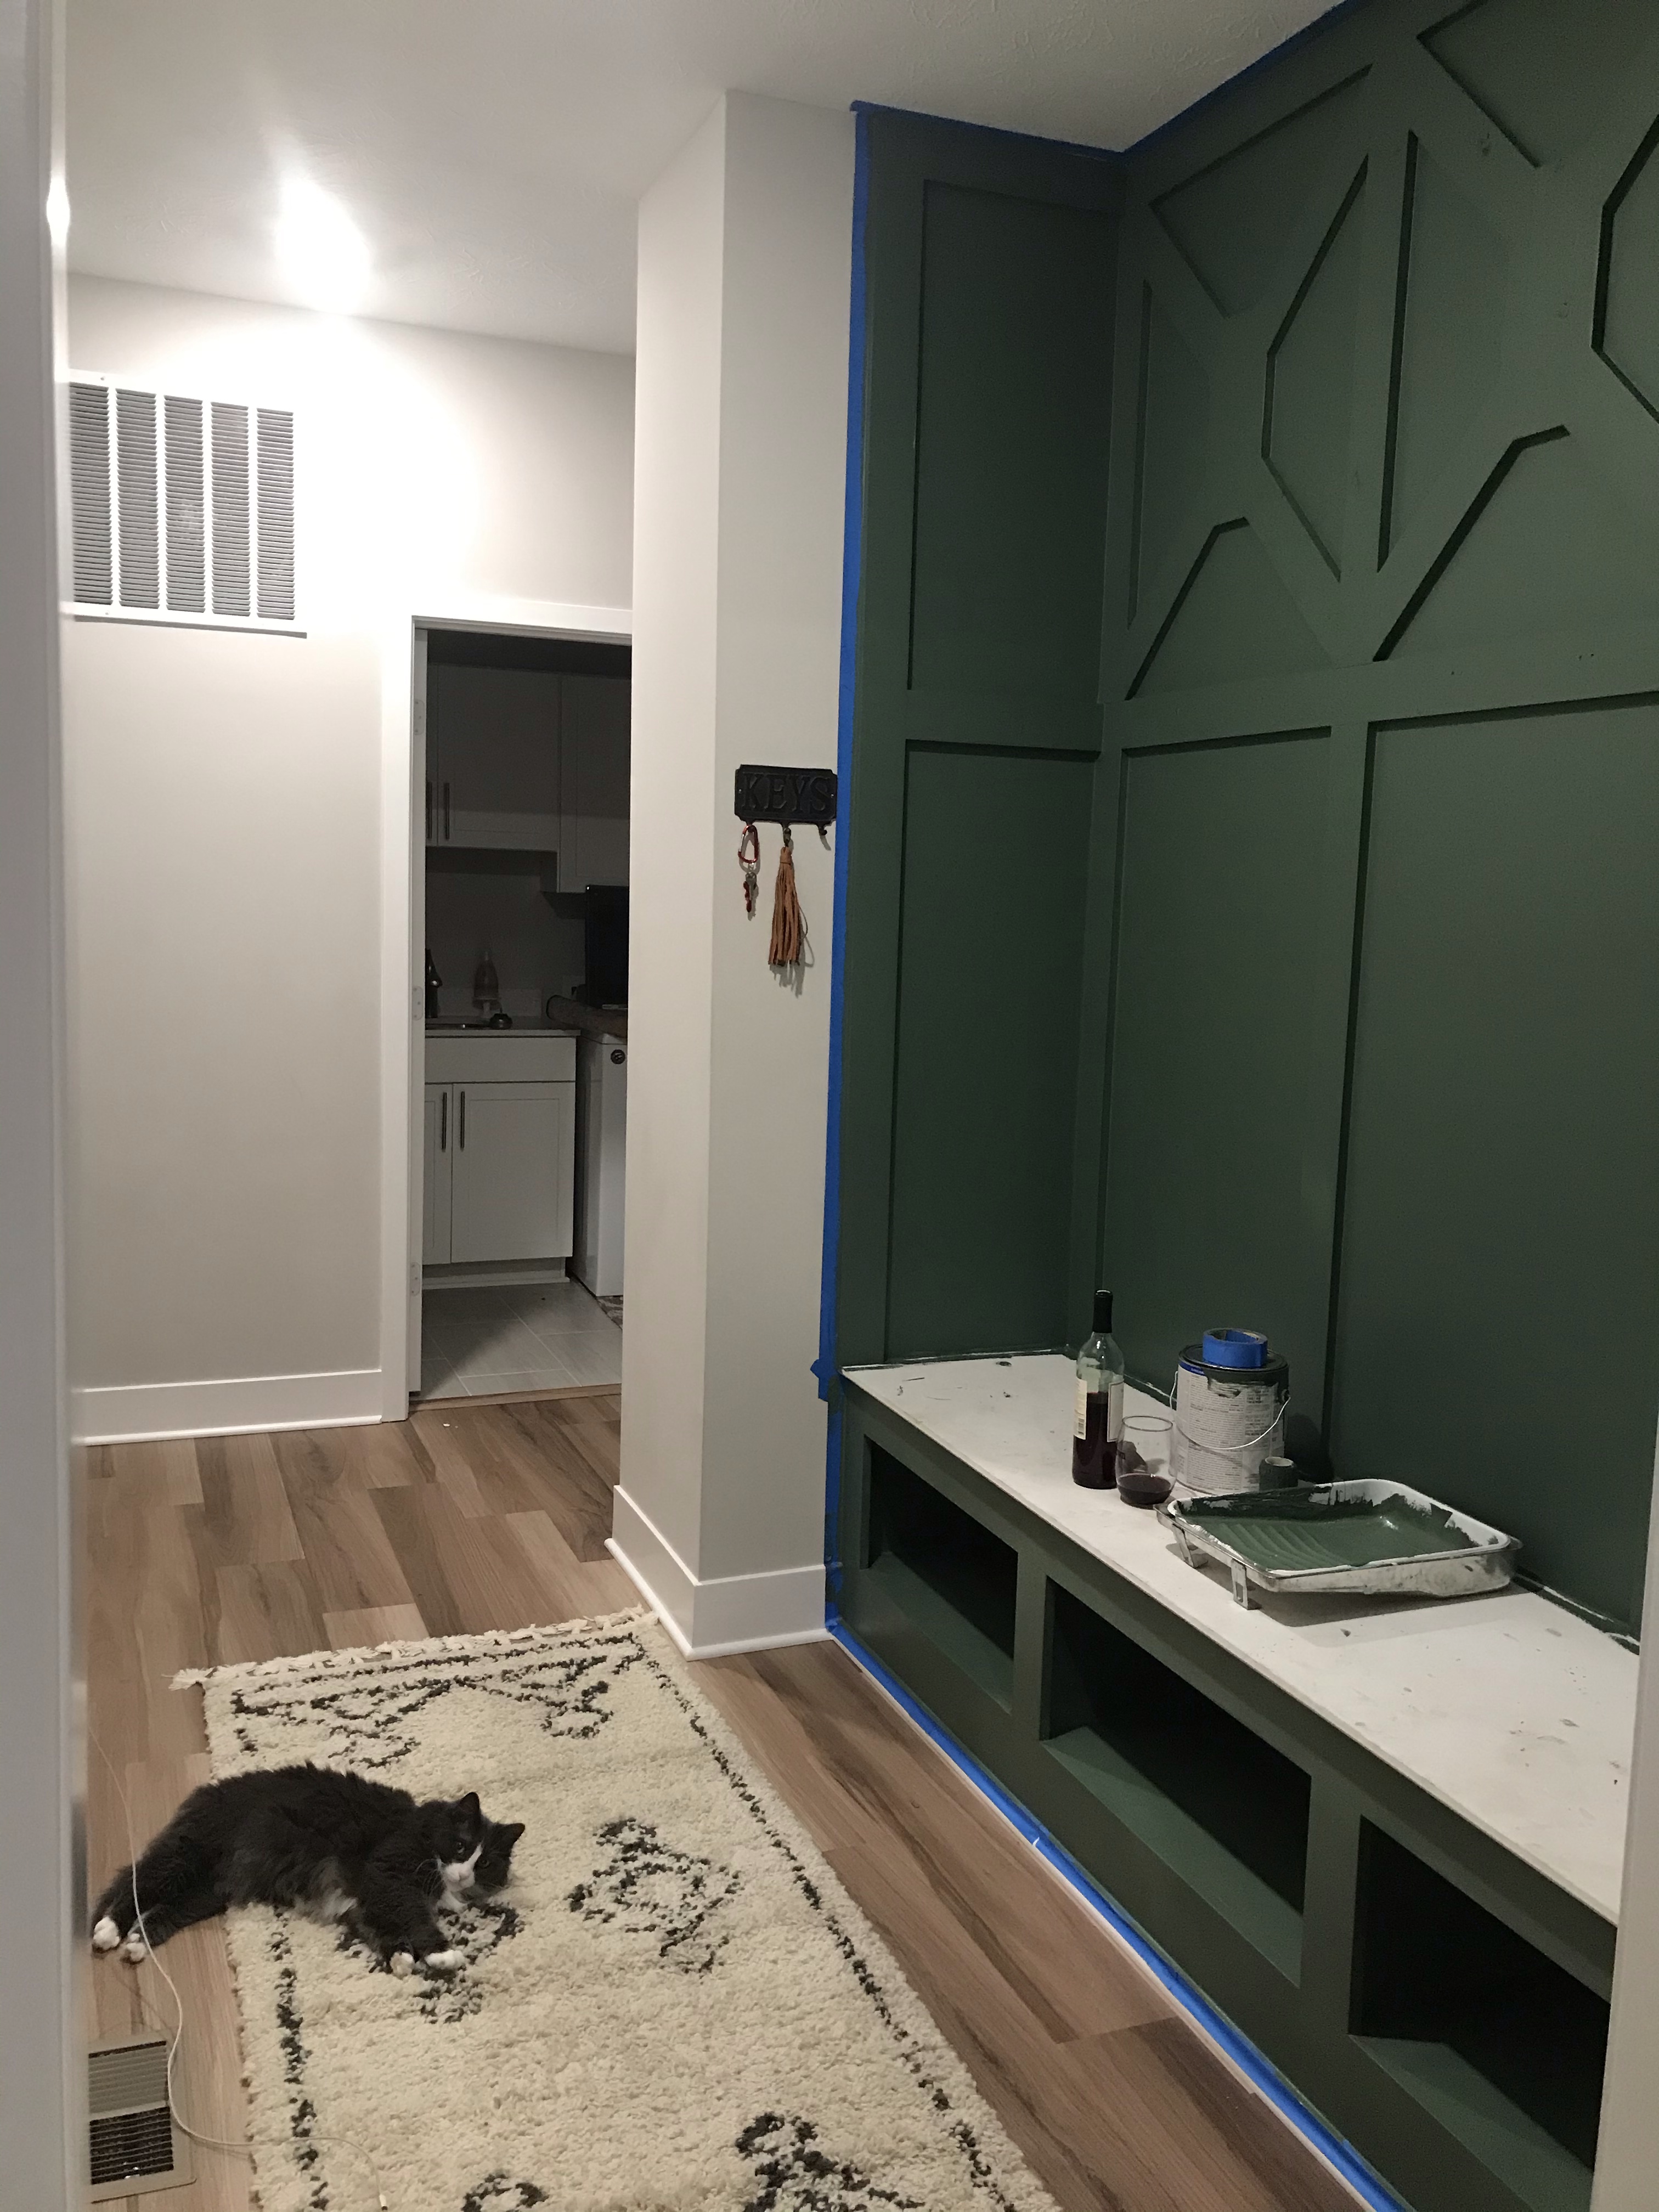
Before we get started, lets take a look back on Memory Lane… I mean a week ago when our mudroom looked like this:
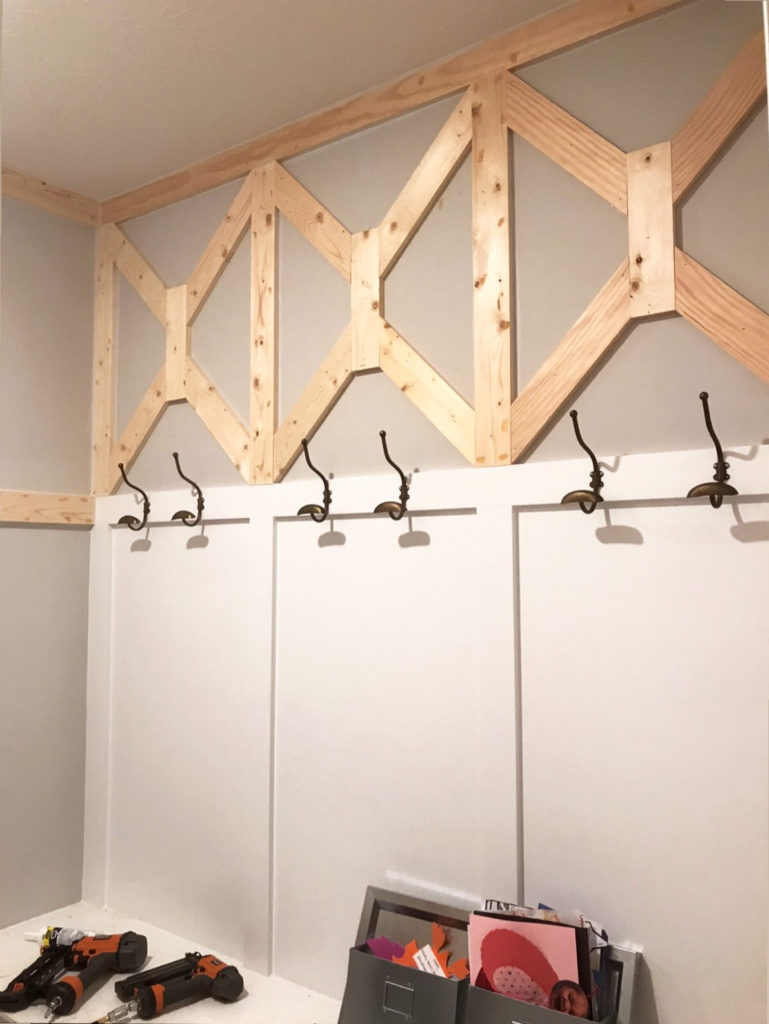
We started by getting similar trim wood to what was already installed on the wall, in our case was 1×4 pine boards. We took the vertical pieced already there all the way to the ceiling and trimmed out the side walls to match. Once we got started on making the trim pieces go all the way to the ceiling, I had to add a pattern in there (just when Ross thought this was too easy). We settles on an ‘X’ pattern for the center of each ‘cubbie’ area which was inspired by our front entry table (which was also made by the handyman husband). This process went fairly quick thanks to good power tools!
Inpiration Piece 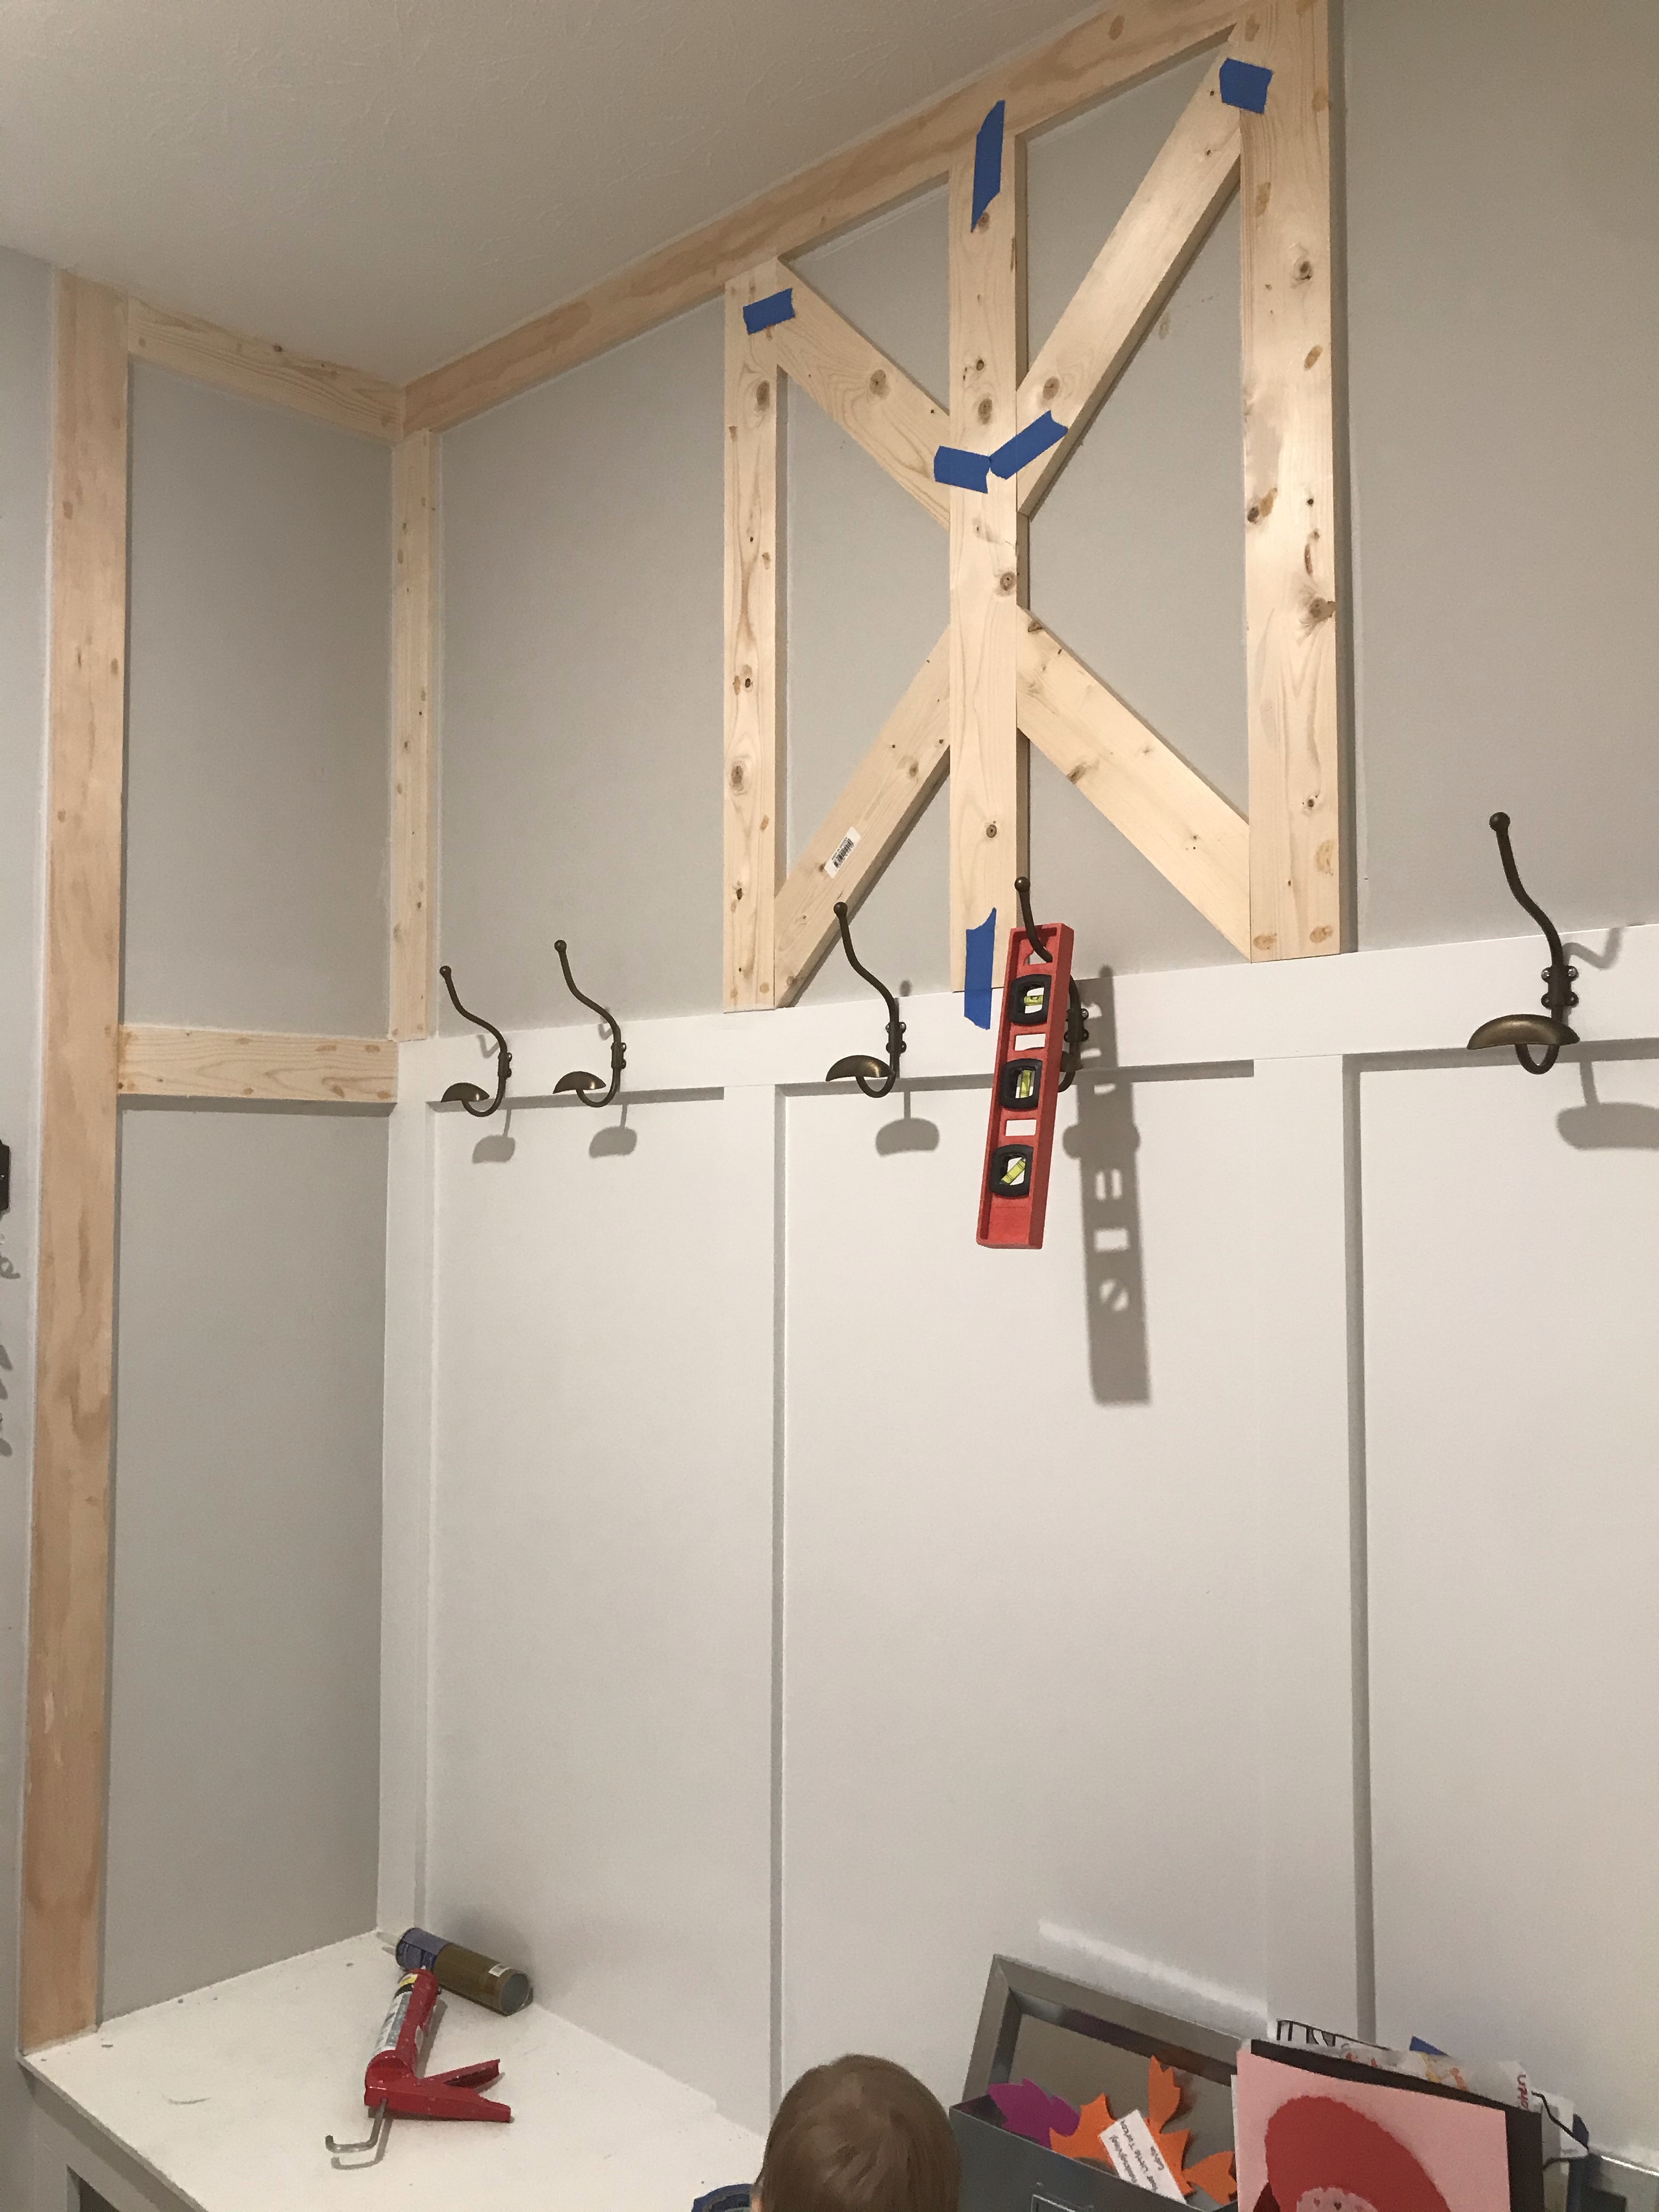
Final Layout
The caulking and filling of nail holes was then taken on by our 3 year old, Cohen, who had a blast helping us with this project. It may have taken us 3 nights to do in this case, but seeing how proud it made him was so worth it!

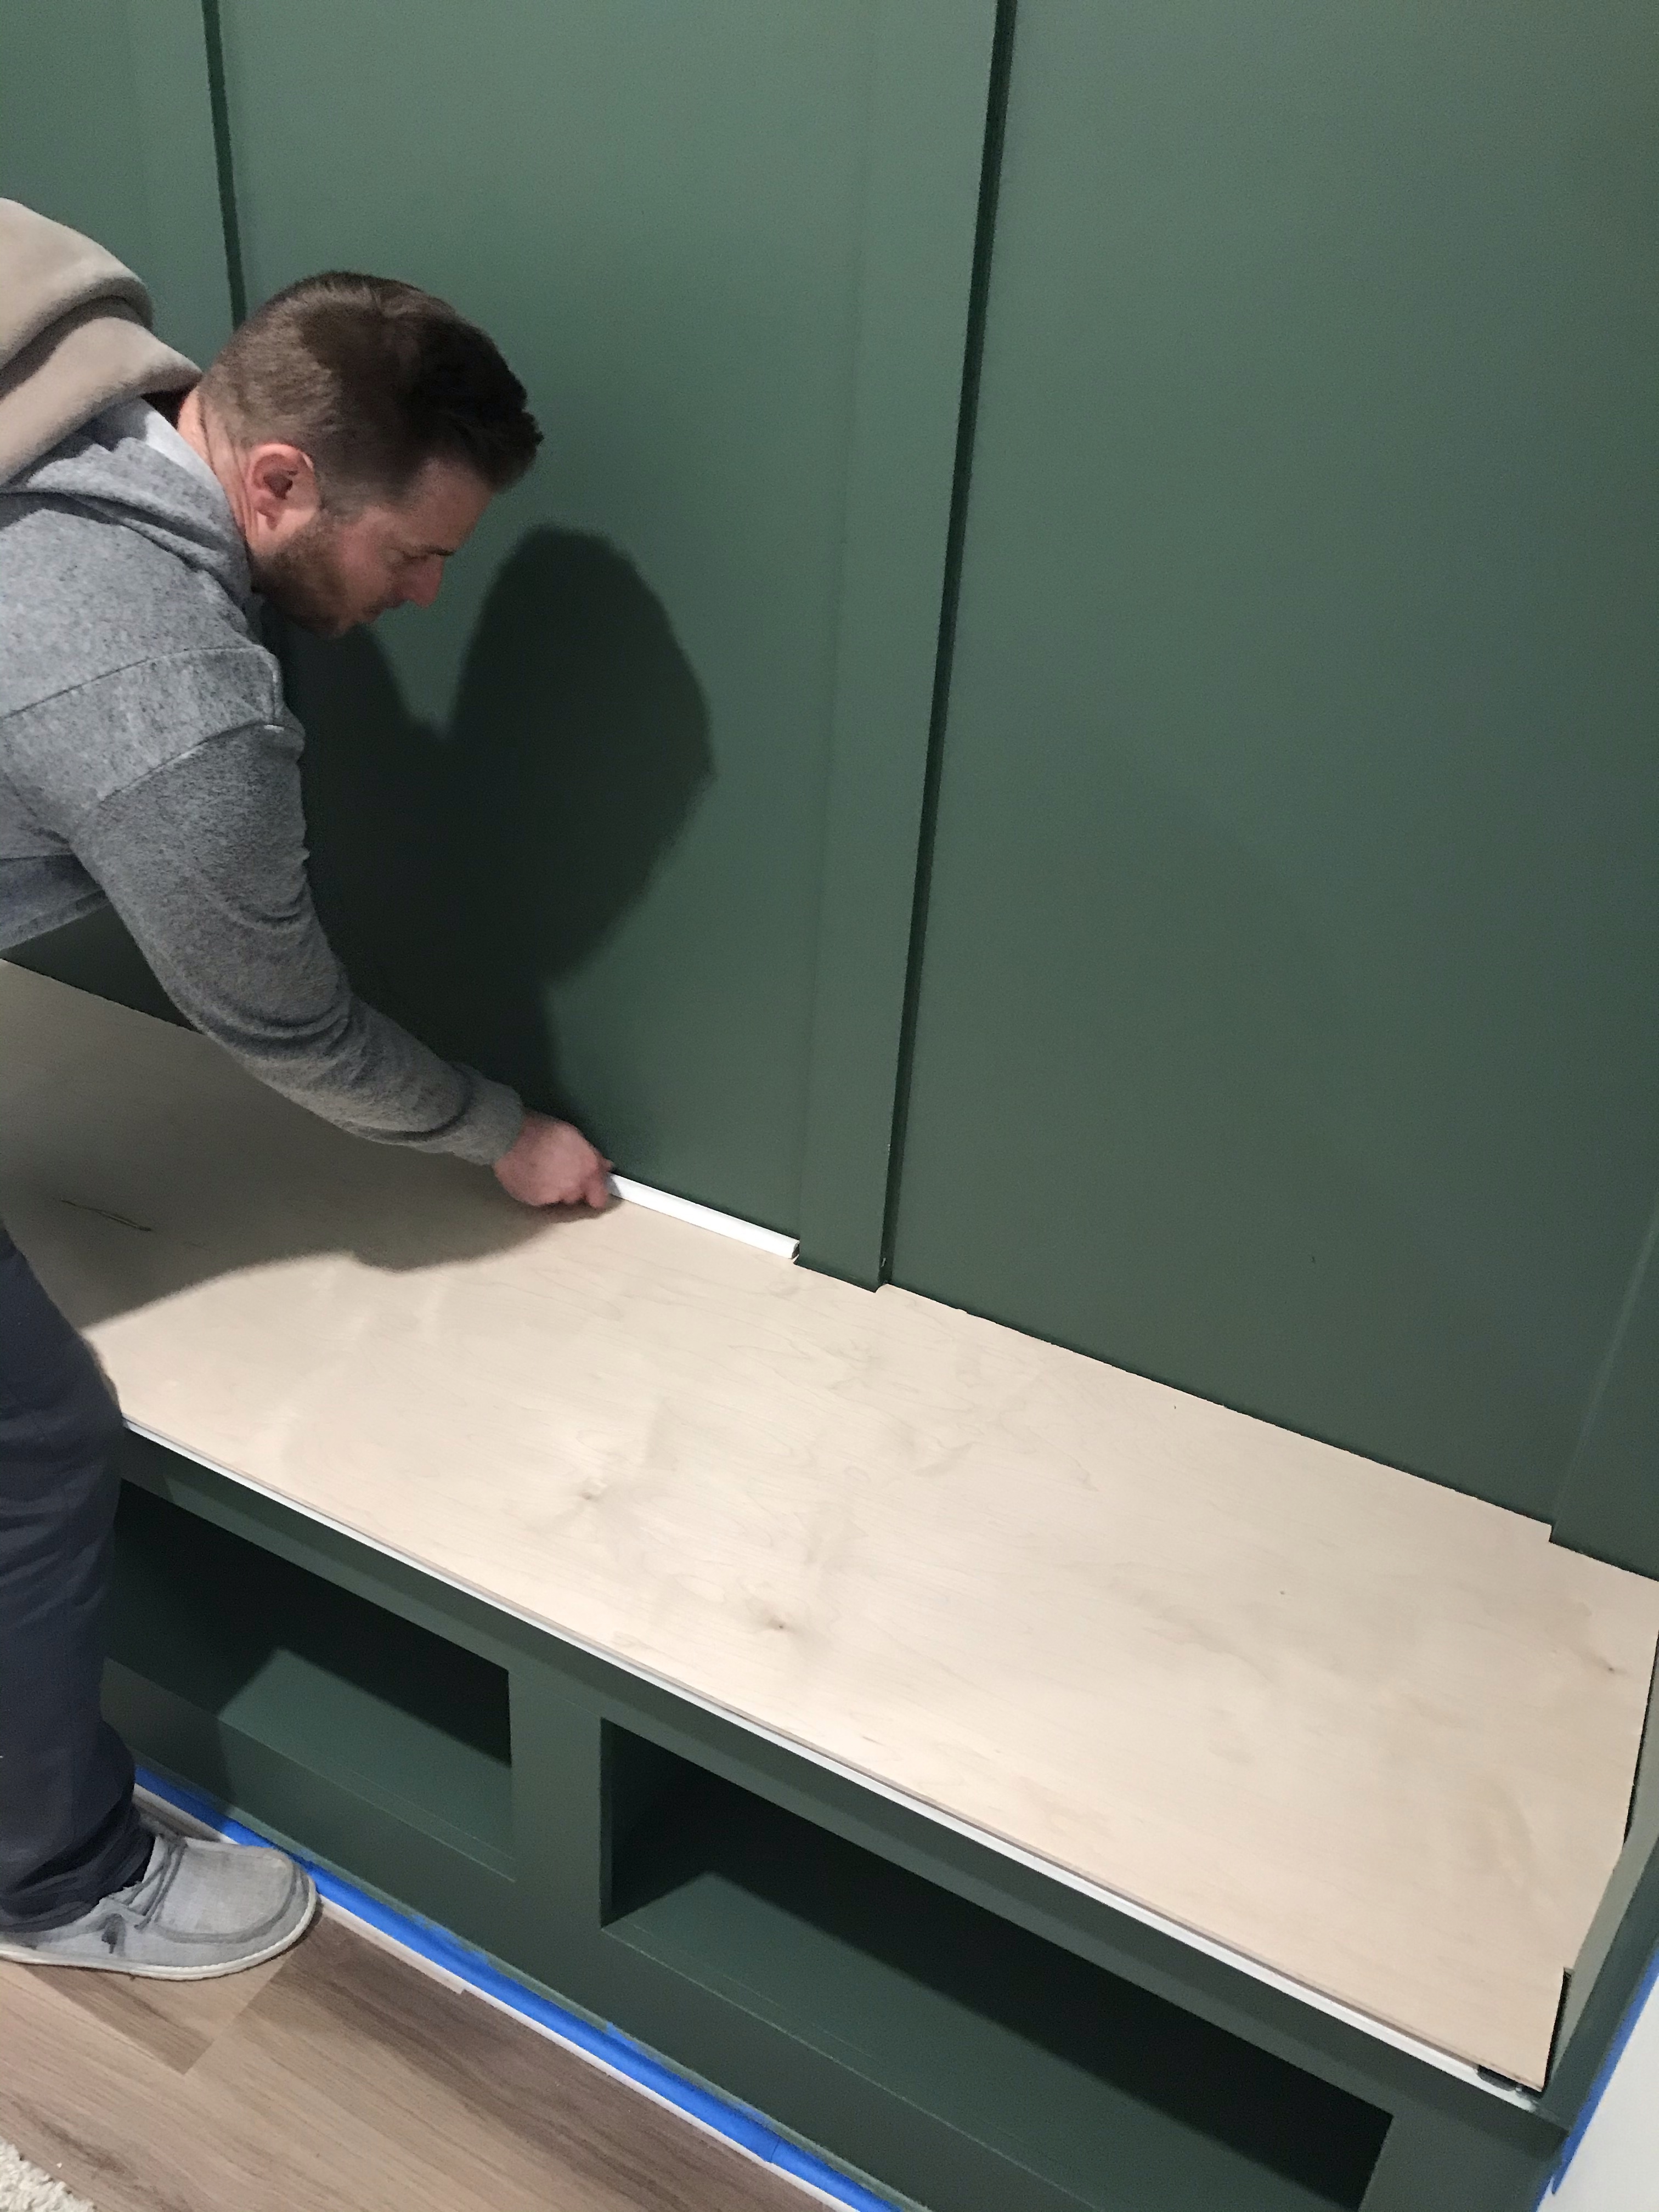
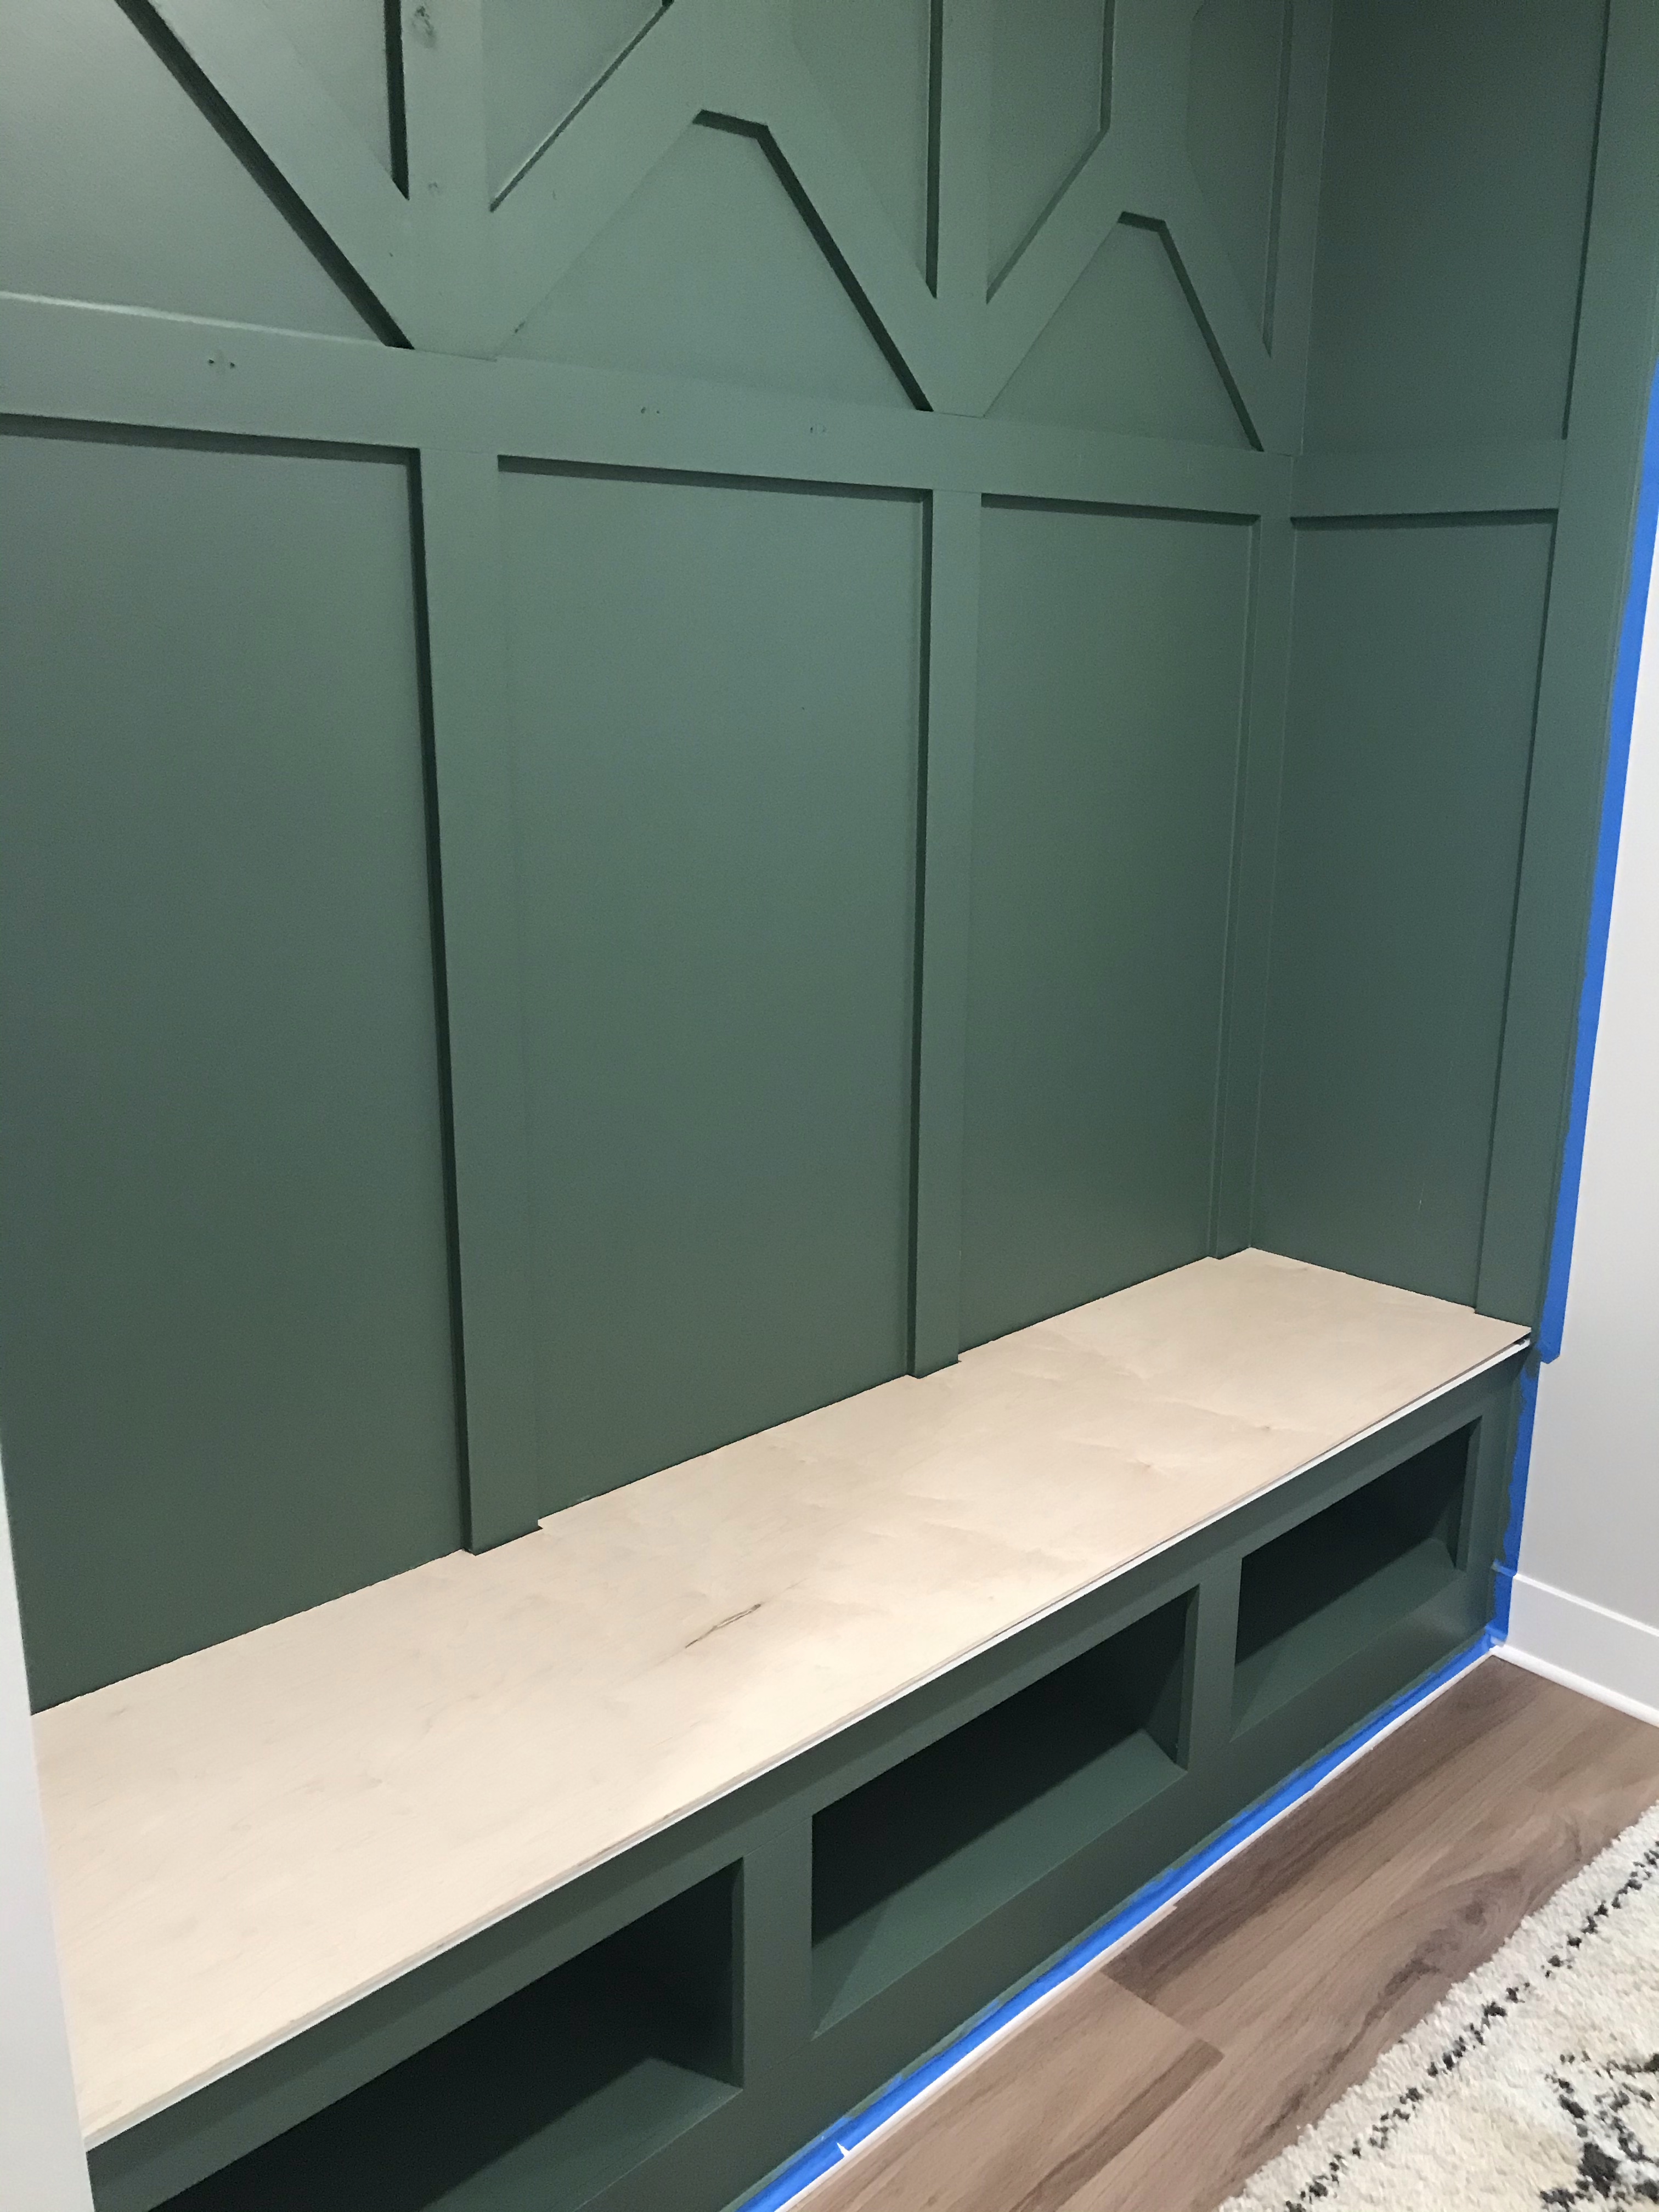
Painting was my job, which I took on happily along with a glass of wine after bedtime for the boys! We did some light sanding on the filled areas and went to town. No primer necessary here. The color went on beautifully with the satin finish. We decided to not paint the top of the bench and instead settled on covering it with a sheet of birch plywood that was cut to fit and trimmed out. This was tedious work, but it paid off! It looks like a continuous wood slab, which is exactly what I envisioned. Staining was quick and easy with Minwax Golden Oak. I simply use an old rag dipped in and then apply quickly in a circular motion to avoid streaking.
Adding the accessories is the fun part. The brass hooks we had on previously went back up and then we were ready for the lighting. We didn’t want to hard wire the sconces as it would have added a lot of time and most likely extra help after we checked out how it looked in the attic. I actually used a great hack called “The Magic Light Trick” I found from another DIY home blogger, Brooke with Nesting With Grace. It involved 47 cent plumbing pipe fittings, super glue, and LED puck lights. I have to say, I couldn’t be happier with the results. The lights we purchased are bright, remote controlled, dimmable, and can be put on a timer. That’s a win in my book. I think this is even better for us than having it hard wired!

This project probably could have been done over a weekend without 2 tiny toddlers in tow, but for us a week long project is a huge win! We loved being able to do this together as a team. It has made a huge impact on the feel of our home since this mudroom space is open to our dining area and can be seen when walking in the front door. This space definitely has our stamp on it and feels more like our personality. I look forward to enjoying this little space… I mean throwing all the gym shoes and backpacks all over it (lol) for years to come!
If you have a space that just collects all the stuff and really doesn’t add anything to your home like us, I encourage you to look at it a different way. All it takes is a little vision, a gallon of your favorite color, and hopefully someone comfortable with a hammer/saw and you are well on your way!